regal bread machine manual

Welcome to the Regal Bread Machine manual! This guide helps you master your bread maker‚ offering automatic bread baking with versatile settings for basic‚ whole grain‚ and gluten-free loaves.

1.1 Overview of the Regal Bread Machine

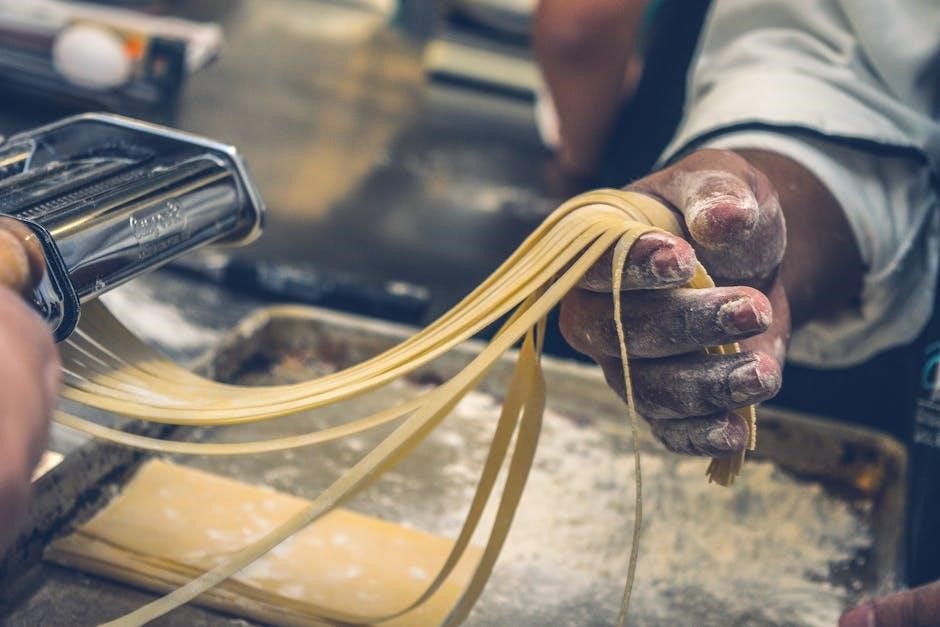
The Regal Bread Machine is a versatile and user-friendly appliance designed to simplify bread making at home. With models like the K6751‚ K6750‚ and K6725‚ it offers a range of features to suit different baking needs. The machine supports loaf sizes up to 2 pounds and includes settings for basic‚ whole grain‚ gluten-free‚ and even jam-making. Its intuitive control panel allows for easy selection of cycles and customization options. The Regal Bread Machine also features a delay timer‚ enabling you to prepare dough or bake bread according to your schedule. Equipped with a non-stick bread pan and a viewing window‚ it ensures consistent results and easy monitoring of the baking process. Perfect for both novices and experienced bakers‚ this machine makes homemade bread accessible and enjoyable for everyone.

1.2 Importance of the Manual

This manual is your essential guide to understanding and operating the Regal Bread Machine effectively. It provides detailed instructions for safe usage‚ troubleshooting‚ and maximizing the machine’s features. Whether you’re a novice or an experienced baker‚ the manual ensures you get the most out of your appliance; It covers critical aspects like electrical safety‚ proper cleaning‚ and maintenance tips to prolong the machine’s lifespan. Additionally‚ the manual includes step-by-step recipes and customization options to help you create perfect loaves. By following the guidelines‚ you can avoid common mistakes and optimize your baking experience. This comprehensive resource is designed to empower you with the knowledge needed to bake confidently and enjoy fresh‚ homemade bread effortlessly.

Safety Precautions

Ensure safe operation by following electrical guidelines‚ avoiding overheating‚ and keeping the machine away from water. Proper ventilation and cautious handling are crucial for user safety.

2.1 General Safety Tips

Always read the manual thoroughly before first use. Keep the bread maker on a stable‚ heat-resistant surface away from water sources. Avoid touching hot surfaces or placing the machine near open flames. Ensure proper ventilation to prevent moisture buildup. Never submerge the appliance in water or expose it to excessive humidity. Keep children away from the machine while it is operating. Use oven mitts when handling the bread pan or basket. Regularly clean the machine to avoid dough residue buildup. Avoid overloading the machine‚ as this can lead to mechanical issues. Store the appliance in a cool‚ dry place when not in use. Always follow the manufacturer’s guidelines for maintenance and troubleshooting.

2.2 Electrical Safety Guidelines

Read all instructions carefully to ensure safe operation. Never immerse the bread maker‚ cord‚ or plug in water or other liquids. Avoid using damaged power cords or plugs‚ as this can lead to electrical hazards. Ensure the machine is placed on a dry‚ stable surface away from water sources. Use the appliance only at the recommended voltage to prevent overheating or damage. Never modify or tamper with the machine’s electrical components. Keep the power cord away from hot surfaces or sharp objects. Avoid overloading electrical outlets. If the machine malfunctions‚ unplug it immediately and contact customer support. Always supervise children when the machine is in use. Follow all local electrical safety regulations and manufacturer guidelines for safe operation.

Understanding the Machine

Familiarize yourself with the Regal Bread Machine’s features‚ including its 11 mix settings‚ 1.5-2 lb loaf capacity‚ and non-stick bread pan for easy cleaning and consistent results.

3.1 Description of Parts

Understanding the components of your Regal Bread Machine is essential for optimal use. The machine features a non-stick bread pan with a handle for easy removal and cleaning. The control panel includes a digital display and buttons for selecting cycles and settings. A mixing paddle ensures dough is evenly kneaded‚ while the heating element and baking chamber work together to bake the loaf perfectly. Additional features like cooling vents help regulate temperature‚ and a removable lid allows for easy monitoring. These parts are designed to simplify the bread-making process‚ ensuring consistent results with minimal effort.

3.2 Control Panel Features

The Regal Bread Machine’s control panel is designed for intuitive operation. It features a digital display that shows selected settings and progress. Buttons allow you to choose from various cycles‚ including basic‚ whole grain‚ and gluten-free options. A delay timer lets you set baking to start later‚ and a crust color selector offers light‚ medium‚ or dark options. The panel also includes a pause function for temporary halts. Additional settings may include special modes for jams or yogurt. The interface is user-friendly‚ ensuring easy navigation. These features provide flexibility and customization‚ making the bread-making process tailored to your preferences. The control panel is essential for achieving consistent‚ high-quality results with minimal effort.

Operating the Machine

Open the cover‚ remove the bread pan‚ and add ingredients. Choose your cycle and settings on the control panel‚ then press Start. The machine handles the rest.

4.1 Basic Operation Instructions

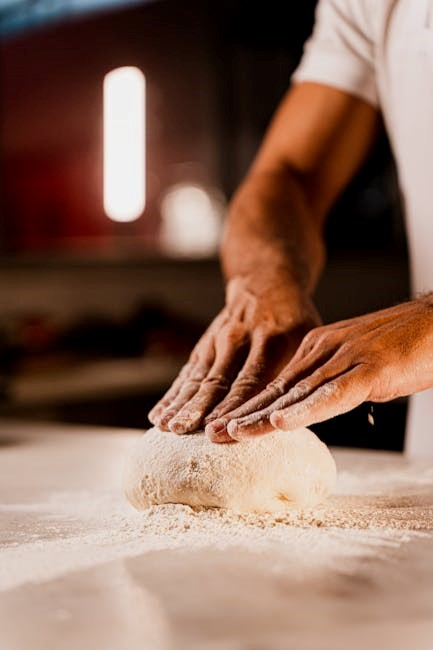
To operate your Regal Bread Machine‚ begin by placing it on a stable‚ flat surface. Open the cover and remove the bread pan. Allow it to cool if necessary. Add ingredients in the recommended order: liquids first‚ followed by dry ingredients‚ and yeast last. Ensure all measurements are precise for optimal results. Close the cover and select the desired cycle using the control panel. Choose settings like loaf size and crust color based on your preference. Press the Start button to begin the process. The machine will automatically mix‚ knead‚ rise‚ and bake your bread. Monitor progress through the viewing window. Once complete‚ let the bread cool before slicing; Regularly clean the pan and machine for maintained performance.

4.2 Selecting the Right Cycle

Selecting the appropriate cycle on your Regal Bread Machine ensures your bread bakes perfectly. Choose from options like Basic‚ Whole Grain‚ Gluten-Free‚ Rapid‚ Dough‚ and Bake. The Basic cycle is ideal for standard bread recipes‚ while Whole Grain handles denser flours. Use Gluten-Free for special dietary needs. The Rapid cycle bakes bread faster‚ perfect for busy schedules. Select Dough for preparing pizza or roll dough without baking. The Bake cycle allows you to finish pre-made dough. Refer to the manual for cycle numbers and settings. Adjust crust color and loaf size as needed. Proper cycle selection ensures optimal results‚ so match your ingredients and preferences to the right option for delicious homemade bread every time.

Recipes and Customization

Explore various recipes for customization with the Regal Bread Machine. Choose from basic‚ whole grain‚ and gluten-free options. Adjust crust color and loaf size to suit preferences.

5.1 Basic Bread Recipes

The Regal Bread Machine offers a variety of basic bread recipes to get you started. From classic white bread to hearty whole grain‚ these recipes are simple and delicious. Follow the manual’s instructions for precise measurements and settings. Begin with the standard bread setting (0-12) and ensure ingredients like flour‚ yeast‚ salt‚ and water are accurately measured. Allow the machine to handle mixing‚ kneading‚ and baking. For best results‚ use room-temperature ingredients and the correct yeast type. These foundational recipes provide a perfect base for experimenting with additional flavors. With practice‚ you’ll master the art of homemade bread effortlessly using your Regal Bread Machine.

5.2 Customizing Your Bread

Customizing your bread with the Regal Bread Machine is easy and rewarding. With 11 mix settings‚ you can experiment with various flavors and ingredients to create unique loaves. Add nuts‚ herbs‚ or seeds during the mix phase for extra texture and taste. For a sweeter loaf‚ incorporate honey or sugar‚ while garlic or cheese can add savory notes. The machine allows you to adjust settings like crust color and loaf size to tailor your bread to your preferences. Try using whole wheat or gluten-free flours for healthier options. For best results‚ add mix-ins after the first kneading cycle. Experiment with different yeasts or oils to enhance rise and flavor. Customization is limitless‚ making every loaf a personalized creation.

Troubleshooting

Common issues include the machine not turning on‚ uneven baking‚ or overmixing. Check power connections‚ ensure proper ingredient measurements‚ and verify bread pan alignment for optimal performance.

6.1 Common Issues and Solutions

Common issues with the Regal bread machine include the machine not turning on‚ uneven baking‚ or overmixing. If the machine doesn’t start‚ ensure it’s properly plugged in and the outlet is working. For uneven baking‚ check that the bread pan is aligned correctly and the machine is on a level surface. Overmixing can occur if ingredients are not measured accurately or added in the wrong order. Allow the machine to cool between cycles to prevent overheating. If the machine tones before completion‚ it may indicate an error. Refer to the user manual for specific error codes and solutions. Regular cleaning and maintenance can also prevent many common issues. Always unplug the machine before cleaning to ensure safety.

6.2 Maintenance Tips

Regular maintenance ensures optimal performance of your Regal bread machine. After each use‚ unplug the machine and allow it to cool before cleaning. Wipe the exterior with a damp cloth and avoid abrasive cleaners. The bread pan and kneading paddle should be washed by hand with mild soap and dried thoroughly to prevent rust. Check for food residue in the machine’s interior and remove any crumbs or dough bits. Store the machine in a dry‚ cool place when not in use. Every few months‚ inspect the machine for wear and tear‚ such as loose connections or damaged parts‚ and replace them if necessary. Proper care extends the lifespan of your bread maker and ensures consistent baking results.

jcb 507-42 specs pdf

The JCB 507-42 telehandler is a versatile machine with a 42-foot reach and 7,000 lbs lifting capacity, ideal for construction and agricultural tasks. Its specs PDF guide provides detailed insights into its capabilities, ensuring optimal performance and informed decision-making for operators and buyers.

Overview of the JCB 507-42 Model

The JCB 507-42 telehandler is a robust and versatile machine designed for demanding environments. With a maximum lift capacity of 7,000 lbs and a 42-foot reach, it excels in construction and agricultural tasks. Its compact design and maneuverable nature make it suitable for tight spaces while maintaining high productivity. The model features a powerful engine, advanced hydraulic systems, and user-friendly controls, ensuring efficient operation. Built for durability, the JCB 507-42 is equipped with reliable components and offers a range of attachments for diverse applications. Its specifications, detailed in the PDF guide, highlight its capabilities, making it a reliable choice for professionals seeking a high-performance telehandler.

Importance of Understanding the Specifications

Understanding the specifications of the JCB 507-42 is crucial for maximizing its performance and ensuring safe operation. The specs PDF provides detailed information on load capacities, engine power, and operational limits, helping operators avoid overloading and maintain equipment longevity. By reviewing the manual, users can identify the right attachments for their tasks, ensuring compatibility and efficiency. Proper adherence to the guidelines prevents potential hazards and optimizes productivity. This knowledge also aids in maintenance planning and troubleshooting, ensuring the telehandler operates at peak efficiency. Familiarity with the specifications is essential for both novice and experienced operators to achieve optimal results in various work environments.

Key Specifications of the JCB 507-42

The JCB 507-42 features a 42-foot lift height, 7,000 lbs maximum capacity, and robust engine performance, making it ideal for demanding construction and agricultural tasks.

Lifting Capacity and Reach

The JCB 507-42 telehandler offers an impressive maximum lifting capacity of 7,000 lbs and a reach of up to 42 feet, making it suitable for high-lift applications. This capability ensures efficient material handling in construction and agricultural settings. The machine’s load chart provides specific details for various attachments, ensuring safe operation within rated limits. Operators can rely on its strength and precision for lifting heavy loads to significant heights, enhancing productivity on the job site. Proper use of JCB-approved attachments is crucial to maintain optimal performance and safety standards.

Engine Power and Performance

The JCB 507-42 telehandler is powered by a robust engine designed to deliver reliable performance for demanding tasks. With a focus on fuel efficiency, the machine ensures low operating costs while maintaining high productivity. Its advanced hydraulic system optimizes power distribution, enabling smooth operation and precise control. The telehandler’s engine is built to handle heavy-duty applications, providing consistent power output even under challenging conditions. Features like load-sensing hydraulics and an auto-stop function further enhance efficiency and reduce wear on the engine. This combination of power and precision makes the JCB 507-42 a reliable choice for construction and agricultural environments.

Dimensions and Weight

The JCB 507-42 telehandler features a compact design with an overall height of 6′ 5″ and a wheelbase of 9′ 2″, making it ideal for maneuvering in tight spaces. Its operating weight is approximately 11,500 lbs, ensuring stability during heavy-duty operations. The machine’s dimensions are optimized for both indoor and outdoor applications, providing excellent visibility and accessibility. The weight distribution is balanced to enhance safety and performance, while the overall size ensures ease of transportation between job sites. These specifications are detailed in the JCB 507-42 specs PDF, offering a clear overview for operators and fleet managers.

  • Overall height: 6′ 5″
  • Wheelbase: 9′ 2″
  • Operating weight: ~11,500 lbs

Operational Features

The JCB 507-42 telehandler is designed for smooth operation, with load-sensing hydraulics and precise control systems. Its ergonomic cab and advanced visibility features enhance operator comfort and efficiency.

Maneuverability and Visibility

The JCB 507-42 telehandler excels in maneuverability and visibility, making it ideal for tight job sites. Its compact design and 360-degree view from the cab ensure precise control and safety. The machine’s hydrostatic transmission allows smooth, easy navigation around obstacles, while the high seating position provides operators with clear visibility of the load and surroundings. These features are crucial for efficient and safe operation in both construction and agricultural settings, as highlighted in the JCB 507-42 specs PDF. Enhanced visibility reduces risks and improves productivity, ensuring operators can handle tasks with confidence and accuracy.

Hydraulic System and Control

The JCB 507-42 telehandler features a robust hydraulic system designed for precise control and efficient operation. With a maximum hydraulic flow rate and pressure, the machine delivers smooth and responsive performance, enabling operators to handle heavy loads effortlessly. The intuitive control layout ensures ease of use, while the advanced hydraulic system minimizes energy loss, optimizing productivity. The JCB 507-42 specs PDF highlights the machine’s hydraulic capabilities, including attachment compatibility and flow adjustment options, making it suitable for a wide range of tasks. This system ensures reliability and durability, reducing downtime and enhancing overall operational efficiency in demanding environments.

Attachments and Accessories

The JCB 507-42 supports a wide range of approved attachments, enhancing its versatility for various tasks. Optional accessories, detailed in the specs PDF, allow customization for specific jobs, ensuring optimal performance and adaptability across different applications.

Approved Attachments for the JCB 507-42

The JCB 507-42 is compatible with a variety of attachments, including pallet forks, buckets, and lifting jibs, all designed to maximize efficiency. The specs PDF outlines the full list of factory-approved accessories, ensuring safe and optimal operation. Operators can choose from a range of tools tailored to specific tasks, whether on construction sites or in agricultural settings. Proper use of these attachments, as detailed in the guide, ensures compliance with safety standards and enhances the machine’s versatility. Always refer to the PDF for compatibility and usage guidelines to maintain performance and warranty.

Customization Options for Specific Tasks

The JCB 507-42 offers extensive customization options to meet diverse operational needs. Operators can tailor the machine with task-specific attachments and configurations, as detailed in the specs PDF. This flexibility allows for seamless integration into various work environments, from construction sites to agricultural fields. The PDF guide provides insights into how to optimize the telehandler for particular applications, ensuring maximum productivity. By leveraging these customization options, users can enhance efficiency and adapt the machine to unique challenges, making it a valuable asset for any project. Regular updates and modular designs further extend its versatility, ensuring long-term performance and adaptability.

Maintenance and Service Requirements

Regular maintenance is crucial for the JCB 507-42. The specs PDF outlines a detailed schedule, ensuring optimal performance and longevity. Adhere to JCB’s guidelines for best results.

Regular Maintenance Schedule

Regular maintenance is essential to ensure the optimal performance and longevity of the JCB 507-42 telehandler. The specs PDF provides a detailed schedule, outlining specific tasks to be performed at regular intervals; These include daily inspections of fluid levels, filters, and tire pressure, as well as weekly checks of hydraulic systems and electrical components. Monthly tasks may involve replacing air filters and lubricating moving parts. Additionally, the PDF recommends servicing the engine and transmission every 500 hours and performing a comprehensive inspection every 1,000 hours. Adhering to this schedule ensures reliability, prevents breakdowns, and maintains the machine’s efficiency over time.

Access to Service Manuals and Guidelines

The JCB 507-42 specs PDF provides comprehensive access to service manuals and guidelines, ensuring operators and technicians can maintain and repair the telehandler effectively. The PDF is available in a digital format, compatible with both Windows and Mac systems, making it easily accessible. It includes detailed maintenance procedures, parts lists, and troubleshooting guides to help users address issues promptly. The manual also outlines safety protocols and best practices for servicing the machine. By following the guidelines, users can ensure optimal performance, extend the machine’s lifespan, and maintain its operational efficiency. Regularly referencing the PDF is essential for proactive maintenance and repair.

Applications and Use Cases

The JCB 507-42 telehandler excels in construction, agriculture, and heavy-duty environments, offering versatility for lifting, moving materials, and operating attachments efficiently across diverse job sites.

Construction and Heavy-Duty Applications

In construction, the JCB 507-42 telehandler is a workhorse, capable of handling heavy materials like bricks, steel beams, and concrete blocks with ease. Its robust design and high lifting capacity make it ideal for demanding environments. On large sites, it efficiently moves pallets of supplies, reducing downtime. The machine’s precision and strength also make it suitable for heavy-duty tasks such as placing heavy machinery or structural components; With its 42-foot reach, it can access high areas, making it versatile for multi-story projects. Whether it’s lifting, shifting, or positioning loads, the JCB 507-42 excels in construction applications, ensuring productivity and reliability.

Agricultural and Farming Uses

The JCB 507-42 telehandler is highly effective in agricultural settings, offering the versatility needed for farming tasks. Its 42-foot reach and 7,000 lbs lifting capacity make it ideal for stacking hay bales, moving heavy equipment, and handling large pallets of feed or seeds. Farmers can efficiently manage livestock supplies and maintain farm infrastructure with ease. The machine’s maneuverability is particularly beneficial in tight farm spaces, allowing operators to navigate between buildings or rows of crops. Its robust design ensures reliability in challenging outdoor conditions, making it a valuable asset for agricultural operations. Whether lifting, shifting, or positioning loads, the JCB 507-42 enhances productivity on the farm.

The JCB 507-42 Specs PDF Guide

The JCB 507-42 specs PDF provides detailed technical specifications, maintenance schedules, and operation guidelines, ensuring operators maximize performance and longevity of the telehandler.

What to Expect in the PDF Document

The JCB 507-42 specs PDF document offers a comprehensive overview of the telehandler’s technical specifications, including lifting capacities, engine details, and dimensional measurements. It also outlines maintenance schedules, operational guidelines, and safety precautions to ensure optimal performance. The document provides detailed load charts, hydraulic system specifications, and approved attachments, making it an essential resource for operators and service personnel. Additionally, it includes troubleshooting tips and service guidelines, ensuring users can address issues promptly. The PDF is formatted for compatibility with various devices, including Windows and Mac, making it easily accessible for professionals in construction and agriculture.

How to Utilize the PDF for Optimal Performance

The JCB 507-42 specs PDF serves as a valuable resource for maximizing the machine’s efficiency. Operators should regularly reference the load charts to ensure safe lifting operations and adjust settings according to the task. The maintenance schedule outlined in the PDF helps prevent downtime and extends equipment lifespan. Additionally, the troubleshooting section enables quick resolution of common issues, minimizing delays. By following the guidelines for approved attachments and hydraulic system management, users can optimize performance. The PDF is compatible with various devices, making it easy to access and reference on the go, ensuring seamless operations in construction and agricultural settings.

The JCB 507-42 telehandler stands out as a robust and versatile machine, ideal for construction and agricultural tasks. Its specs PDF provides essential details for optimal performance, ensuring safe and efficient operations. By adhering to the maintenance schedule and guidelines outlined in the PDF, users can extend the machine’s lifespan and maintain its productivity. The document’s compatibility with various devices makes it easily accessible, enhancing usability. Overall, the JCB 507-42 specs PDF is a comprehensive resource that empowers operators to maximize the machine’s potential while minimizing downtime.

chemistry notes pdf

Chemistry notes in PDF format offer a comprehensive and accessible way to study key concepts, reactions, and theories. They provide organized content, making it easier for students to review and prepare for exams. With detailed explanations and visual aids, PDF notes complement textbooks and online resources, ensuring a deeper understanding of chemistry. They are especially useful for revision and quick reference, helping students grasp complex topics efficiently. This format is ideal for modern learners who prefer digital study materials. By using PDF notes, students can focus on active learning strategies and problem-solving techniques, enhancing their overall academic performance. These notes are a valuable resource for anyone aiming to master chemistry effectively.

1.1 Importance of Chemistry Notes in PDF Format

Chemistry notes in PDF format are essential for students due to their portability and accessibility. They can be easily downloaded and accessed on various devices, making studying convenient. PDF notes are often well-organized, with clear headings and sections, which helps students quickly locate specific topics. The formatted text and visuals, such as diagrams and charts, enhance understanding and retention. Additionally, PDF notes are ideal for revision, as they allow students to highlight and annotate important points. They also serve as a quick reference for complex concepts, ensuring that key information is readily available. Furthermore, PDF notes are cost-effective and environmentally friendly compared to printed materials. Overall, they provide a flexible and efficient way to study chemistry, catering to the needs of modern learners. Their convenience and organization make them a valuable resource for academic success in chemistry.

Using PDF notes for chemistry offers numerous benefits, particularly for students seeking efficient learning tools. PDFs are highly portable, allowing students to access their study materials anywhere, on any device, without relying on internet connectivity. This flexibility is especially useful for reviewing concepts during commutes or in environments with limited resources. Additionally, PDF notes can be easily annotated, enabling students to highlight key terms, add notes, and mark important sections for future reference. They also provide a clean and professional layout, making complex chemistry concepts more digestible. Since PDFs are shareable, students can collaborate by exchanging notes, fostering a collaborative learning environment. Furthermore, PDF notes are often concise, focusing on essential information, which helps students avoid overwhelming textbooks. By organizing knowledge in a structured format, PDF notes enhance retention and simplify revision, making them an indispensable resource for chemistry students aiming to excel in their studies.

Key Topics Covered in Chemistry Notes PDF

1.2 Benefits of Using PDF Notes for Chemistry Students

PDF notes provide unmatched convenience, allowing students to access chemistry material anytime, anywhere. Their compact format ensures essential concepts are neatly organized, reducing study time. Annotated notes enhance understanding, while sharing capabilities foster collaboration. PDFs are ideal for last-minute revisions, ensuring clarity and retention. They simplify complex topics, making learning more efficient and enjoyable. Overall, PDF notes are a practical tool for modern chemistry students. They offer flexibility, accessibility, and a focused approach to mastering chemistry. By using PDF notes, students can streamline their study process and achieve better academic outcomes. These resources are indispensable for effective learning, providing a structured pathway to success in chemistry. Their benefits make them a preferred choice among students seeking to excel in their studies. PDF notes truly empower students to learn chemistry with ease and confidence.

2.1 Atomic Structure and Chemical Bonding

Atomic structure and chemical bonding are foundational concepts in chemistry, forming the basis for understanding molecular interactions. Chemistry notes PDFs detail the structure of atoms, including protons, neutrons, and electrons, and their arrangement in the periodic table. These notes explain how electrons occupy orbitals and how their configurations influence chemical properties. Key topics include ionic, covalent, and metallic bonds, exploring their formation and characteristics. The periodic table is highlighted as a tool for predicting bond types and chemical behavior. Students learn about Lewis structures, molecular geometry, and bond polarity, essential for analyzing reactions. These concepts are critical for grasping chemical reactivity, stoichiometry, and thermodynamics. The notes emphasize real-world applications, such as materials science and biochemistry, illustrating the relevance of atomic structure and bonding. By mastering these topics, students build a robust foundation for advanced chemistry studies, enabling them to tackle complex problems with confidence.

2.2 Molecules and Chemical Reactions

Molecules and chemical reactions are central to understanding chemical processes. Chemistry notes PDFs explain how molecules form through chemical bonds and undergo transformations. Key topics include stoichiometry, balancing equations, and reaction types, such as synthesis, decomposition, single replacement, and double replacement reactions. Students learn about chemical equilibrium, reaction rates, and catalysts, which are crucial for predicting outcomes. The notes also cover acid-base reactions, oxidation-reduction processes, and organic reactions, highlighting mechanisms and product formation. Practical examples and diagrams illustrate concepts like activation energy and reaction pathways. These topics are essential for solving problems in chemistry, from laboratory experiments to industrial applications. By studying molecules and reactions, students gain insights into how substances interact and change, forming a cornerstone of chemical knowledge.

2.3 Periodic Table and Its Applications

The periodic table is a foundational tool in chemistry, organizing elements by atomic structure and properties. Chemistry notes PDFs detail how the table helps predict elemental behavior, chemical reactions, and trends. Students learn to identify periods, groups, and families, understanding relationships between elements. The notes explain periodic trends, such as atomic radius, electronegativity, and electron affinity, which are vital for predicting properties. Applications include identifying metals, non-metals, and metalloids, as well as understanding ionic and covalent bonding. The periodic table also aids in classifying elements into categories like alkali metals, noble gases, and transition metals. These insights are crucial for solving problems in chemistry, from balancing equations to analyzing reaction mechanisms. By mastering the periodic table, students gain a deeper understanding of chemical principles and their practical applications in various fields. This section in chemistry notes PDFs is essential for building a strong foundation in chemistry.

Study Techniques for Effective Learning

Effective learning involves active strategies like summarizing notes, self-quizzing, and group discussions. Practical problem-solving tips and regular revision enhance understanding. Utilize resources like textbooks and online platforms for deeper insights.

3.1 Active Learning Strategies

Active learning strategies involve engaging deeply with study materials to enhance understanding. Techniques include summarizing notes, self-quizzing, and group discussions. Using tools like ChatGPT to analyze lectures or creating concept maps can deepen comprehension. Regularly reviewing and organizing notes helps retain information. Applying knowledge through practice problems and experiments reinforces learning. Encouraging critical thinking by asking questions and seeking explanations improves mastery. Utilizing digital resources, such as interactive simulations, makes complex concepts more accessible. Collaborative learning through study groups or online forums fosters shared understanding. Active participation in classroom activities and consistent revision are key to long-term retention. By integrating these strategies, students can maximize their learning potential and excel in chemistry. These methods ensure that students remain engaged, motivated, and proactive in their academic journey. Effective use of time and resources is essential for achieving success in this dynamic field. Chemistry notes in PDF format serve as a valuable companion for implementing these strategies effectively.

3.2 Tips for Solving Chemistry Problems

Mastering chemistry requires a systematic approach to problem-solving. Begin by thoroughly understanding the problem statement and identifying key concepts involved. Break down complex problems into simpler steps, focusing on one aspect at a time. Use visual aids like diagrams or flowcharts to clarify reactions and processes. Practice consistently, starting with basic problems and gradually tackling more advanced ones. Review mistakes to identify patterns and improve problem-solving techniques. Apply fundamental principles, such as stoichiometry or thermodynamics, to real-world scenarios. Collaborate with peers or teachers to discuss challenging problems and gain new insights. Utilize online platforms and study guides for additional practice materials. Regularly revise and organize notes to reinforce understanding. By combining these strategies, students can develop problem-solving skills and confidence in chemistry, ensuring long-term success in their studies.

Resources and References

Recommended textbooks and online platforms provide foundational knowledge. Additional guides, practice sets, and interactive tools enhance learning. These resources support comprehensive understanding and effective study routines, aiding chemistry students.

4.1 Recommended Textbooks and Online Platforms

For a solid foundation in chemistry, textbooks like NCERT Chemistry and Organic Chemistry by JG Smith are highly recommended. Online platforms such as Khan Academy, Coursera, and edX offer structured courses and video lectures. These resources provide detailed explanations, practice problems, and interactive simulations, making complex concepts more approachable. They are particularly useful for students looking to deepen their understanding beyond PDF notes. Additionally, platforms like Chemistry LibreTexts and MIT OpenCourseWare offer free, high-quality educational content. These resources are essential for students aiming to excel in chemistry, as they provide a blend of theoretical knowledge and practical applications. Utilizing these textbooks and online platforms can significantly enhance learning outcomes and exam preparation. They are invaluable tools for any chemistry student seeking to master the subject.

4.2 Additional Study Materials and Guides

Beyond textbooks and online platforms, supplementary materials like practice worksheets, video tutorials, and interactive simulations can enhance learning. Websites such as Chemistry LibreTexts and Khan Academy offer free resources, including practice problems and step-by-step solutions. Video tutorials on YouTube channels like 3Blue1Brown and Crash Course Chemistry provide engaging explanations of complex topics. Additionally, interactive simulations from platforms like PhET Interactive Simulations allow students to visualize chemical processes, making abstract concepts more tangible. Study guides, such as CliffsNotes and Schaum’s Outlines, are excellent for quick revisions and concept summaries. Flashcards and mnemonics from apps like Anki can aid in memorizing key terms and reactions. These materials help students reinforce their understanding and apply concepts to real-world problems, ensuring a well-rounded study approach. They are invaluable for deepening knowledge and improving problem-solving skills in chemistry.

Mastering chemistry requires consistent effort and the right resources. Chemistry notes in PDF format provide a structured approach to learning, making complex concepts accessible. By utilizing these notes alongside active learning strategies and practical problem-solving techniques, students can achieve a deeper understanding of the subject. Regular revision and the use of additional study materials will further enhance their grasp of chemistry. With dedication and the right tools, students can excel in their studies and build a strong foundation for future academic and professional endeavors in science.

5.1 Final Tips for Mastering Chemistry

To excel in chemistry, adopt a systematic approach to studying. Begin by strengthening foundational concepts using chemistry notes in PDF format, which provide concise and organized information. Engage in active learning by solving problems regularly and reviewing reactions and mechanisms. Utilize online platforms and textbooks for additional practice and clarity. Focus on understanding periodic trends and their applications, as they form the backbone of chemical behavior. Practice past exam questions to familiarize yourself with common question patterns and time management. Collaborate with peers or mentors to discuss challenging topics and gain new insights; Finally, stay consistent with revision and apply theoretical knowledge to real-world scenarios to reinforce learning. By following these strategies, students can confidently master chemistry and achieve academic success.

writing prompts for kids pdf

Writing prompts for kids are engaging tools designed to spark creativity and inspire young writers. They offer structured yet flexible starting points for stories, essays, or reflections, catering to various ages and skill levels. Available in formats like PDF worksheets, checklists, or interactive activities, these prompts help students develop writing skills while fostering imagination and critical thinking. They are widely used in classrooms and homes to make writing fun and accessible for children of all abilities.

1.1 What Are Writing Prompts?

Writing prompts are structured starting points designed to inspire and guide children in creative writing. Available in formats like PDFs, checklists, or interactive activities, they provide topics or questions that spark imagination, helping kids develop writing skills through engaging and age-appropriate exercises tailored to various skill levels and interests.

1.2 Why Are Writing Prompts Important for Kids?

Writing prompts are essential for fostering creativity, improving writing skills, and building confidence in children. They provide structured yet flexible starting points, encouraging kids to express their thoughts and imagination freely. These tools are particularly valuable for reluctant writers, helping them overcome writer’s block while developing essential literacy and communication skills in a fun, engaging manner.

1.3 Popular Writing Prompt Resources for Children

Popular resources include PDF worksheets, checklists, and interactive activities designed to engage kids. These tools offer diverse prompts, such as finishing stories or rewriting fairy tales, catering to various ages and interests. They are easily accessible, printable, and adaptable, making them ideal for both classroom and home use to inspire young writers creatively.

Benefits of Using Writing Prompts for Kids

Writing prompts foster creativity, build confidence, and encourage reluctant writers. They provide structured starting points, making writing fun and accessible while developing critical thinking and communication skills in children.

2.1 Fostering Creativity and Imagination

Writing prompts for kids spark creativity by offering engaging scenarios or questions that inspire unique ideas. They encourage imaginative storytelling, helping children explore diverse perspectives and express their thoughts vividly. These tools act as a springboard for artistic expression, enabling kids to craft original narratives and develop their critical thinking skills through creative writing.

2.2 Building Confidence in Writing Skills

Writing prompts for kids help build confidence by providing clear starting points, reducing anxiety, and allowing children to express themselves freely. Achievable tasks and positive feedback encourage progress, fostering a sense of accomplishment. This supportive approach helps young writers feel empowered, leading to improved skills and a lifelong love for writing.

2.3 Encouraging Reluctant Writers

Writing prompts for kids are especially effective for reluctant writers, offering fun and engaging topics that spark curiosity. Interactive formats, such as “Would You Rather” questions, make writing feel like a game, reducing pressure. These prompts help hesitant students overcome fears, fostering creativity and gradually building their confidence in expressing ideas on paper.

Types of Writing Prompts for Kids

Writing prompts for kids include creative, narrative, and descriptive formats, offering diverse ways to inspire young writers. They feature engaging topics and structured exercises to explore ideas.

3.1 Creative Writing Prompts

Creative writing prompts for kids encourage imaginative storytelling by presenting unique scenarios or questions. Examples include inventing a new holiday, describing a magical world, or writing from an object’s perspective. These prompts help children explore their creativity, develop original ideas, and express their thoughts vividly, fostering a love for writing and self-expression.

3.2 Narrative Writing Prompts

Narrative writing prompts guide kids to craft compelling stories with a clear beginning, middle, and end. Examples include writing about a first-day-of-school experience or imagining a character’s adventure. These prompts help students develop storytelling skills, such as creating dialogue, describing settings, and building relatable characters, fostering a strong foundation in narrative writing techniques and creativity.

3.3 Descriptive Writing Prompts

Descriptive writing prompts encourage kids to use vivid language to paint detailed pictures. Examples include describing a magical forest or a favorite season. These prompts help students practice sensory details, enhancing their ability to convey emotions and imagery effectively, while making their writing more engaging and immersive for readers of all ages.

How to Create Effective Writing Prompts

Effective writing prompts engage kids creatively by mixing story ideas, using “Would You Rather” questions, and incorporating visuals; They stimulate imagination and provide clear direction, making writing fun and accessible for children of all skill levels and interests.

4.1 Mixing and Matching Story Ideas

Mixing and matching story ideas encourages creativity and flexibility in writing. By combining different characters, settings, and plot twists, kids can craft unique narratives. This method helps students develop critical thinking and storytelling skills while keeping the process fun and engaging, as seen in many PDF resources with mix-and-match prompts.

4.2 Using “Would You Rather” Questions

“Would you rather” questions are engaging writing prompts that encourage kids to think creatively and make choices. They often involve fun or thought-provoking scenarios, sparking imagination and decision-making skills. These prompts are simple yet effective, helping students develop clear opinions and articulate their reasoning in writing, as seen in many PDF resources for kids.

4.3 Incorporating Visual and Multimedia Elements

Visual and multimedia elements, like images, videos, or audio clips, can enhance writing prompts for kids. These tools help students visualize stories, sparking creativity and engagement. Many PDF resources include picture-based prompts, while interactive apps combine text with multimedia to make writing more dynamic and accessible for diverse learners of all ages.

Age-Specific Writing Prompts

Age-specific writing prompts cater to the developmental needs of children, offering tailored exercises for elementary, middle, and high school students. These prompts adapt to their maturity levels, ensuring engaging and appropriate writing experiences that foster growth and creativity at each stage.

5.1 Writing Prompts for Elementary School Students

Elementary writing prompts are designed to captivate young learners, fostering creativity and basic writing skills. Examples include “Imagine you found a magical pencil—what would you draw?” or “Write about a day where everything turns into candy.” These prompts are simple, fun, and tailored to spark imagination in early-grade students, encouraging them to express their thoughts and ideas confidently. They often come in visually engaging formats like printable PDF worksheets or colorful activity cards, making writing an enjoyable experience. The prompts are crafted to align with the developmental level of elementary students, helping them build foundational writing skills while exploring their creativity freely.

5.2 Writing Prompts for Middle School Students

Middle school writing prompts are designed to challenge developing writers, encouraging deeper thinking and more complex compositions. Examples include crafting a character’s diary entry, writing about historical events from alternative perspectives, or envisioning futuristic scenarios. These prompts help students refine their writing skills while engaging with topics relevant to their age and interests.

5.3 Writing Prompts for High School Students

High school writing prompts are crafted to stimulate critical thinking and advanced writing skills. Examples include analytical essays on literary themes, persuasive arguments on contemporary issues, and reflective narratives about personal growth. These prompts encourage students to explore complex ideas, develop well-supported arguments, and refine their communication skills through diverse writing formats.

Digital Tools for Writing Prompts

Digital tools like printable PDF worksheets, interactive writing apps, and online platforms provide accessible and engaging ways for kids to explore writing prompts and develop their skills.

6.1 Printable PDF Worksheets

Printable PDF worksheets are popular tools for delivering writing prompts to kids. They often include creative story ideas, checklists, and structured exercises. These worksheets are easy to download and print, making them ideal for classrooms or home use. Many resources offer themed prompts, such as adventure, friendship, or imagination-based topics, to engage young writers effectively.

6.2 Interactive Writing Apps

Interactive writing apps offer dynamic ways for kids to engage with prompts. Many apps feature voice-to-text options, timers, and collaborative tools to make writing fun. They often include grade-specific prompts and exercises, catering to different skill levels. These apps are ideal for tech-savvy students, providing immediate feedback and fostering engagement through interactive elements and rewards.

6.4 Online Platforms for Sharing Prompts

Online platforms provide accessible spaces for sharing and discovering writing prompts. Websites like LitFest and educational forums offer interactive features, allowing kids to post their work and receive feedback. These platforms often include customizable prompts, fostering creativity and collaboration. They also enable teachers to share resources, making it easier for students to access diverse writing ideas and connect with peers globally.

Cultural and Social Sensitivity in Writing Prompts

Cultural and social sensitivity in writing prompts ensure inclusivity, respecting diverse backgrounds and identities. They encourage kids to explore and appreciate differences, fostering empathy and understanding of global perspectives.

7.1 Promoting Diversity in Story Ideas

Promoting diversity in story ideas encourages children to explore different cultures, traditions, and perspectives. Writing prompts that highlight various backgrounds foster inclusion and help kids develop empathy. By incorporating diverse characters and settings, these prompts create relatable and engaging stories for all students, ensuring every child sees themselves represented in the narratives they create.

7.2 Addressing Real-World Issues

Writing prompts that tackle real-world issues, such as environmental conservation or social justice, empower kids to think critically about global challenges. These topics inspire meaningful stories, helping children articulate their thoughts on subjects like racism, equality, and sustainability. By addressing these issues, prompts foster a deeper understanding of the world and encourage compassionate responses through creative writing.

7.3 Encouraging Empathy Through Writing

Writing prompts that focus on empathy help kids understand different perspectives and emotions. Activities like writing from another character’s viewpoint or describing how someone might feel in a challenging situation foster compassion. These exercises encourage children to connect with others, promoting kindness and tolerance while enhancing their emotional intelligence and communication skills.

Real-World Applications of Writing Prompts

Writing prompts prepare kids for standardized tests, enhance communication skills, and develop critical thinking. They also apply to real-life scenarios, fostering practical writing abilities for everyday situations.

8.1 Preparing for Standardized Tests

Writing prompts help kids practice structured writing, essential for standardized tests. They enhance critical thinking and communication skills, enabling students to articulate ideas clearly and confidently. Regular use of prompts exposes children to diverse topics, improving their ability to address test questions effectively and creatively. This prepares them for essay sections and timed writing tasks.

8.2 Developing Critical Thinking Skills

Writing prompts encourage kids to analyze scenarios, solve problems, and make informed decisions. They stimulate curiosity and logical reasoning, helping children evaluate ideas and express opinions clearly. Through structured and imaginative exercises, prompts enhance problem-solving abilities, preparing kids to approach challenges with a thoughtful and analytical mindset in academic and real-world situations.

8.3 Enhancing Communication Skills

Writing prompts help kids articulate their thoughts clearly and organize ideas effectively. Through structured exercises, they learn to express opinions, describe experiences, and convey emotions coherently. Prompts like “Would You Rather” encourage creative yet articulate responses, fostering confidence in communication and preparing them to engage effectively in conversations and collaborations.

Avoiding Common Pitfalls in Writing Prompts

Overly complex prompts confuse kids, while irrelevant topics disengage them. Providing insufficient guidance can hinder creativity. Ensure prompts are simple, relatable, and offer clear direction.

9.1 Overly Complex Prompts

Overly complex prompts can confuse young writers, stifling their creativity. Simple, clear language is essential to ensure kids understand the task. Avoid jargon and focus on relatable topics to keep them engaged and motivated. Ensure prompts are age-appropriate and aligned with their developmental stage for better results and increased confidence in writing.

9.2 Lack of Relevance to Kids’ Interests

Writing prompts that don’t align with children’s interests can lead to disengagement. Incorporate topics kids find exciting, such as adventures, animals, or fantasy worlds. Relatable themes spark curiosity and enthusiasm, making writing a enjoyable experience. Tailoring prompts to their passions ensures they stay motivated and eager to express their creativity effectively. This fosters a love for writing.

9.3 Insufficient Guidance for Young Writers

Young writers often need clear direction to thrive. Providing detailed instructions, examples, and visual aids ensures they understand expectations. Without proper guidance, kids may feel overwhelmed or lose interest. Offering structured prompts, checklists, and feedback mechanisms helps them navigate the writing process confidently, fostering growth and creativity in a supportive learning environment.

Measuring Progress with Writing Prompts

Tracking improvement in writing skills is essential. Regular feedback and review of completed prompts help identify growth. Celebrating achievements, no matter how small, motivates young writers to continue improving.

10.1 Tracking Improvement Over Time

Consistently using writing prompts allows educators to monitor progress. Over time, improvements in grammar, creativity, and coherence become evident. By reviewing past work, students and teachers can celebrate growth and identify areas needing refinement, fostering a sense of accomplishment and encouraging continued effort in developing writing skills effectively.

10.2 Providing Constructive Feedback

Constructive feedback is key to enhancing writing skills. Teachers and parents should highlight strengths and suggest areas for improvement. Specific comments on creativity, grammar, and clarity guide students. Positive reinforcement encourages confidence, while actionable advice helps refine their craft, making feedback a valuable tool in their writing journey and development process.

10.3 Celebrating Creative Achievements

Celebrating creative achievements motivates students to continue writing. Recognizing their work through displays, readings, or awards fosters pride and confidence. Sharing accomplishments with peers or online platforms can inspire others and create a supportive community. Acknowledgment reinforces the value of their efforts, encouraging them to explore their creativity further and develop a lifelong love for writing.

Future Trends in Writing Prompts for Kids

Future trends include AI-powered prompts, gamified writing activities, and global collaboration projects. These innovations aim to make writing engaging and accessible for kids worldwide, fostering creativity and skill development through interactive and collaborative tools.

11.1 Integration with AI Tools

AI tools are revolutionizing writing education by generating intelligent prompts, offering real-time feedback, and personalizing learning experiences. These tools engage reluctant writers with interactive exercises and adapt to individual needs through NLP and machine learning, making writing instruction more effective and enjoyable for kids of all skill levels and interests.

11.2 Gamification of Writing Activities

Gamification transforms writing into engaging games, using points, badges, and challenges to motivate kids. Interactive apps and platforms turn prompts into adventures, fostering excitement and competition. This approach makes writing less tedious, encouraging reluctant writers to participate actively and develop their skills through fun, reward-based learning experiences tailored to their interests and abilities.

11.3 Global Collaboration Projects

Global collaboration projects connect kids worldwide through shared writing prompts, fostering cultural exchange and diverse perspectives. Students engage in joint storytelling, share ideas, and learn from one another. These initiatives promote teamwork, empathy, and global understanding, preparing kids to communicate effectively in an interconnected world while enhancing their writing skills and creativity together.

zanussi double oven instruction manual

Safety Information

Always read the manual before installation and use. Manufacturer not liable for incorrect installation. Keep children away; use protective gloves. First use may cause an unpleasant smell.

1.1 Important Safety Considerations

Read the manual carefully before installation and use. The manufacturer is not liable for damages from incorrect installation. Keep children away and use protective gloves. An unpleasant smell may occur during first use due to bonding agents. Ensure proper ventilation and avoid overheating; Only a qualified person should install the appliance. Do not install or use a damaged oven. Keep flammable materials away and avoid using harsh abrasive cleaners. Metal utensils or acidic substances can damage surfaces. Improper use may cause injury or fire hazards.

1.2 Precautions for Installation and Use

Only a qualified person should install the appliance. Remove all packaging before installation. Do not install or use a damaged oven. Keep flammable materials away from the appliance. Avoid placing metal utensils or acidic substances inside, as they may damage surfaces. Ensure proper ventilation during use to prevent overheating. Never leave cooking unattended, especially when children are present. Use oven mitts or gloves when handling hot surfaces or accessories to avoid burns.

Product Description

The Zanussi double oven is a built-in appliance offering a spacious 103-liter capacity, 4900W power output, and multiple heating options for versatile cooking, designed for efficient performance.

2.1 Key Features of the Zanussi Double Oven

The Zanussi double oven offers a 103-liter capacity, providing ample space for cooking. It features 4900W power output for efficient performance. Multiple heating options, including bake, roast, and grill, ensure versatile cooking. The oven includes a stainless steel finish for durability and modern aesthetics. Built-in clock functions allow for precise time management. Safety features like child locks and automatic shut-off enhance security. Its design ensures even cooking across both oven compartments, making it ideal for large families or professional chefs.

2.2 Components and Accessories

The Zanussi double oven comes with essential components like shelves, trays, and racks for versatile cooking. It includes slide-in accessories that fit securely, ensuring proper placement. The oven features a built-in clock for convenient time management. Additional accessories may include a grill pan and oven gloves for enhanced functionality. These components are designed to optimize cooking performance and ease of use, making the oven a practical choice for various culinary needs.

Installation and Setup

Only a qualified person should install the oven. Remove all packaging and ensure the appliance is undamaged. Install slide-in accessories with edges at the back, pointing downward.

3.1 Installation Requirements

Installation must be performed by a qualified person only. Ensure the appliance is undamaged before installation. Built-in double ovens require precise measurements to fit into kitchen units. Level the oven to ensure proper functioning. Connect to a suitable electrical supply, adhering to local regulations. Remove all packaging and ensure the area is clear. Follow the manufacturer’s guidelines for venting and spacing. Ensure the oven is securely fastened to prevent tipping. Refer to the manual for specific installation diagrams and instructions.

3.2 Initial Setup and Configuration

Before first use, ensure all packaging is removed and the oven is clean. Set the clock and select your preferred language using the control panel. Perform a first heat cycle at 200°C for 30 minutes to eliminate any manufacturing residues. This may cause a temporary unpleasant smell. Ensure shelves and trays are properly positioned. Refer to the manual for specific setup instructions tailored to your model. Always follow the recommended initial setup procedure for optimal performance.

Operating the Double Oven

Select desired cooking mode via the mode selector knob. Set temperature using the control panel. Ensure shelves are correctly positioned for even cooking and optimal performance.

4.1 Cooking Modes and Functions

The Zanussi double oven offers multiple cooking modes, including bake, roast, grill, and conventional cooking. These functions ensure versatile cooking options for various dishes. The oven also features even baking at different heights, slow cooking for tender results, and a defrost function for efficient meal preparation. Each mode is easily selectable via the control panel, providing precise temperature control and optimal performance for consistent cooking results.

4.2 Temperature Control and Settings

The Zanussi double oven features precise temperature control, allowing for accurate heat adjustment. The digital display ensures easy monitoring of settings. Use the control panel to select the desired temperature, which ranges from 50°C to 250°C. Preheating is essential for optimal results. The oven also offers even heat distribution for consistent cooking. Always use oven gloves when handling hot dishes. For precise cooking, ensure racks are correctly positioned and avoid overcrowding trays for even airflow and temperature circulation.

Maintenance and Care

Regularly clean the oven to prevent food buildup. Avoid harsh chemicals; use gentle cleaners. Check heating elements and racks for damage. Ensure proper ventilation during cleaning cycles.

5.1 Cleaning the Oven

Regular cleaning is essential for maintaining your Zanussi double oven’s performance. Wipe exterior surfaces with a damp cloth and mild detergent. Avoid harsh chemicals or abrasive cleaners, as they may damage finishes. For interior cleaning, use the oven’s pyrolytic function, which heats to high temperatures to burn food residue. After cooling, wipe ash with a damp cloth. Remove racks and shelves for separate washing. Ensure the oven is cool before cleaning to avoid burns or damage.

5.2 Regular Maintenance Tips

Ensure the oven is switched off and cool before performing any maintenance. Check electrical connections regularly for damage or wear. Inspect door seals for integrity to maintain heat efficiency. Clean racks and shelves after each use to prevent food buildup. Avoid using abrasive cleaners, as they may damage surfaces. Refer to the manual for approved cleaning products. Regularly check and replace worn-out parts to ensure optimal performance. Always unplug the oven before servicing to avoid accidents.

Troubleshooting Common Issues

Check power supply and connections. Consult the error code list in the manual for guidance. Ensure the oven door is properly aligned and closed. Use the troubleshooter guide for common fixes. Contact customer support if issues persist.

6.1 Identifying and Solving Common Problems

Common issues include the oven not heating, uneven cooking, or error codes. Check the power supply and connections first. Refer to the error code list in the manual for specific solutions. Ensure the oven door is properly aligned and closed. Clean the oven regularly to prevent food residue buildup. If the issue persists, consult the troubleshooting guide or contact customer support for assistance. Always follow the manufacturer’s instructions for repairs.

6.2 Resetting the Oven and Error Codes

To reset the oven, switch it off, wait a few minutes, then turn it back on. This often resolves minor issues. If an error code appears, refer to the manual for its meaning. Address the specific issue as instructed. Ensure the oven is cool before any maintenance. For persistent problems, contact customer support or a professional technician. Always follow safety guidelines and avoid attempting complex repairs yourself to prevent further damage.

Additional Resources

Download the full user manual for detailed instructions. Visit Zanussi’s official website for customer support, troubleshooting guides, and additional resources to maximize your appliance’s performance and longevity.

7.1 Downloading the Full User Manual

To access the complete user manual for your Zanussi double oven, visit the official Zanussi website; Navigate to the support section and enter your appliance’s model number in the search bar. Select your specific model to view and download the PDF manual. Ensure to save it for future reference. The manual includes detailed instructions, safety guidelines, and troubleshooting tips to help you make the most of your appliance. Consider the environment and only print if necessary.

7.2 Accessing Customer Support

For assistance with your Zanussi double oven, visit the official Zanussi website. Click on the “Support” section and enter your appliance’s model number to find dedicated resources. You can access troubleshooting guides, FAQs, and repair booking options. Additionally, contact Zanussi customer support directly via phone or email for personalized help. Ensure to have your appliance’s serial number ready for efficient service. Visit the Zanussi website today to resolve any queries or schedule a repair service conveniently.

Warranty and Service Information

Your Zanussi double oven is covered under a manufacturer’s warranty. Register your appliance for extended support and view terms on the Zanussi website. Book repairs online.

8.1 Warranty Coverage and Terms

Your Zanussi double oven is covered by a manufacturer’s warranty, offering protection against defects in materials and workmanship. The warranty period varies by region and product registration. Ensure proper installation and usage to maintain coverage. Damage from misuse or unauthorized repairs may invalidate the warranty. For full details, including terms and conditions, refer to the warranty document provided with your appliance or visit the Zanussi website. Warranty claims must be submitted through authorized service centers.

8.2 Scheduling a Repair Service

To schedule a repair, visit the Zanussi website and navigate to the support section. Log in to your account and select your registered appliance. Provide details of the issue and preferred service dates. A certified technician will be assigned to address the problem. Ensure the appliance is accessible, and have your warranty information ready if applicable. Repairs are typically scheduled promptly to minimize inconvenience. For urgent issues, contact customer support directly for assistance.

gmc acadia owners manual

The GMC Acadia Owner’s Manual is your comprehensive guide to understanding and maintaining your vehicle. It covers essential information on safety features, advanced technology, seating configurations, and maintenance schedules to ensure optimal performance. Designed for models from 2007 to 2025, this manual is a vital resource for all Acadia owners, providing detailed instructions and troubleshooting tips to keep your SUV running smoothly.

Overview of the Manual’s Purpose and Structure

The GMC Acadia Owner’s Manual is designed to provide owners with a clear understanding of their vehicle’s features, operation, and maintenance. Organized into logical sections, the manual covers topics such as safety features, advanced technology, seating configurations, and maintenance schedules. It also includes troubleshooting guides and model-specific details, ensuring comprehensive coverage for Acadia owners. The manual is structured to be user-friendly, with detailed instructions and diagrams to help drivers optimize their vehicle’s performance and safety. Available as a downloadable PDF, it serves as an essential resource for owners of GMC Acadia models from 2007 to 2025, offering accessible information for everyday use and long-term care.

Importance of Reading the Manual for Vehicle Maintenance

Reading the GMC Acadia Owner’s Manual is crucial for proper vehicle maintenance and ensuring optimal performance. It provides detailed guidance on recommended maintenance intervals, fluid checks, and routine inspections to prevent potential issues. The manual outlines specific procedures for checking oil, coolant, and other essential systems, helping owners identify and address problems early. By following the manual’s instructions, drivers can extend the lifespan of their vehicle, reduce repair costs, and maintain safety on the road. It also serves as a valuable resource for troubleshooting common issues, ensuring owners are well-equipped to handle unexpected situations. Regularly referencing the manual helps owners stay informed and proactive about their vehicle’s care.

Downloading and Accessing the GMC Acadia Owners Manual

The GMC Acadia Owner’s Manual is available for free download in PDF format for models from 2007 to 2025, easily accessible online for viewing, printing, or saving.

Free PDF Downloads for GMC Acadia Manuals (2007-2025)

GMC Acadia owners can access free PDF downloads of their vehicle’s manual for models spanning from 2007 to 2025. These manuals are readily available online, offering comprehensive guides tailored to each specific year. Whether you need instructions for the 2023 model or the 2007 version, downloading the PDF ensures you have all the necessary information at your fingertips. The manuals cover everything from routine maintenance to advanced features, making them an indispensable resource for optimal vehicle care and understanding. By visiting reputable websites or official GMC resources, owners can quickly and easily obtain these manuals, ensuring they are well-informed about their Acadia’s operation and maintenance requirements.

Steps to View, Print, or Save the Manual

To access the GMC Acadia manual, visit a reliable website and select your vehicle’s model year. Download the PDF version, which is compatible with most devices. Once downloaded, you can view the manual using a PDF reader. For printing, select specific pages or the entire document and use a printer. To save, store the PDF on your computer, cloud storage, or mobile device for easy access. Ensure your device has adequate storage and a PDF viewer installed. Regularly check for updates to keep your manual current. These steps allow you to conveniently reference your GMC Acadia manual whenever needed, ensuring you always have the information to maintain and enjoy your vehicle.

Key Features of the GMC Acadia Covered in the Manual

The manual highlights key features like safety systems, advanced technology, versatile seating configurations, and interior comfort, providing a comprehensive guide to the Acadia’s capabilities and enhancements.

Safety Features and Advanced Technology

The GMC Acadia manual details its robust safety features, including forward collision alerts, lane departure warnings, and adaptive cruise control. Advanced technology like the infotainment system, GPS navigation, and smartphone integration are also covered, ensuring drivers can utilize these tools effectively. The manual explains how to operate and customize these systems, enhancing both safety and driving convenience. By understanding these features, owners can maximize their vehicle’s potential and enjoy a safer, more connected driving experience. Proper use of these technologies is essential for optimal performance and safety on the road.

Seating Configurations and Interior Comfort

The GMC Acadia manual highlights the vehicle’s versatile seating configurations, offering ample space for passengers and cargo. It details how to adjust seats, fold rear rows, and optimize storage. The manual also explains the interior comfort features, such as heated and ventilated seats, dual-zone climate control, and premium upholstery options. Owners can learn how to customize their driving experience using adjustable settings and advanced infotainment systems. The Acadia’s interior is designed for comfort and practicality, ensuring a pleasant ride for all occupants. By following the manual’s guidance, owners can fully utilize the vehicle’s seating and comfort options to enhance their daily driving experience.

Maintenance and Service Schedule

The GMC Acadia manual outlines recommended maintenance intervals and routine checks to ensure optimal vehicle performance. Regular servicing, fluid level checks, and timely repairs are emphasized for longevity.

Recommended Maintenance Intervals

The GMC Acadia manual specifies maintenance intervals to ensure your vehicle runs efficiently. Regular oil changes are recommended every 5,000 to 7,500 miles, depending on driving conditions. Tire rotations should occur every 7,500 to 10,000 miles to maintain even tread wear. Brake pads and rotors should be inspected every 12,500 miles, while spark plugs typically need replacement every 100,000 miles. The manual also outlines specific intervals for air filters, belts, and fluid checks. Adhering to these schedules helps prevent mechanical issues, extends the vehicle’s lifespan, and ensures safety on the road. Proper maintenance is key to optimizing performance and reliability in your GMC Acadia.

How to Check Fluid Levels and Perform Routine Checks

The GMC Acadia manual guides owners on checking essential fluids and performing routine inspections to maintain vehicle health. Start by ensuring the engine is cold, then locate the oil dipstick under the hood to check oil levels. Coolant, transmission, and brake fluids should also be inspected at recommended intervals. Use the dipstick or reservoir markings to verify levels, and top up as needed with the specified fluids. Additionally, check tire pressure monthly, using the values listed on the tire information placard. Inspect the air filter for dirt and replace it every 15,000 to 30,000 miles. Regularly examine belts and hoses for cracks or wear. These routine checks help prevent mechanical issues and ensure your Acadia runs safely and efficiently.

Troubleshooting Common Issues

The GMC Acadia manual provides guidance for diagnosing and resolving common issues. Refer to the section on warning lights and error codes for detailed solutions to dashboard alerts.

Diagnosing Warning Lights and Error Codes

The GMC Acadia manual includes a detailed guide for diagnosing warning lights and error codes. This section helps owners identify and understand dashboard indicators, ensuring timely resolutions. It provides a comprehensive list of common warning lights, such as engine, battery, and brake system alerts, along with their meanings. Owners can find step-by-step instructions to troubleshoot issues, reset systems, and address error codes. The manual also outlines when professional assistance is required, emphasizing safety and preventing potential damage. By referencing this section, Acadia owners can efficiently resolve issues, ensuring their vehicle operates optimally. This feature is invaluable for maintaining the vehicle’s performance and longevity.

Common Problems and Solutions

The GMC Acadia manual addresses common issues owners may encounter, providing practical solutions. For example, infotainment system glitches can often be resolved by restarting the system or updating software. Transmission concerns, such as rough shifting, may require checking fluid levels or visiting a certified service center. Oil leaks, another common issue, are typically diagnosed through visual inspections and addressed by replacing faulty gaskets or seals. The manual also offers guidance on resolving error codes and warning lights, helping owners identify when professional assistance is needed. By addressing these issues promptly, owners can maintain their vehicle’s performance and longevity, ensuring a safe and enjoyable driving experience.

Infotainment and Navigation System Guide

The GMC Acadia Owner’s Manual provides a detailed guide to the infotainment system, including AM/FM/DAB radio, Bluetooth connectivity, and a responsive touch screen. The navigation system offers GPS mapping, voice commands, and integration with Apple CarPlay and Android Auto, ensuring a connected and enjoyable driving experience.

Operating the Infotainment System

Operating the GMC Acadia’s infotainment system is straightforward and intuitive. The system features a high-resolution touch screen display, voice command functionality, and steering wheel controls for seamless operation. Drivers can access AM/FM/DAB radio, Bluetooth connectivity, and smartphone integration via Apple CarPlay and Android Auto. The interface allows users to customize home screens, set up favorites, and navigate through menus effortlessly. Voice commands enable hands-free control of calls, music, and navigation. The system also supports wireless charging and USB connectivity for convenient device pairing. For a personalized experience, users can adjust settings like display brightness, audio equalization, and system updates directly through the infotainment interface.

Setting Up and Using GPS Navigation

Setting up and using the GPS navigation system in your GMC Acadia is a simple process that enhances your driving experience. Start by entering your destination using the touch screen or voice command; The system supports real-time traffic updates and turn-by-turn directions, ensuring accurate route guidance. You can save frequently visited locations as favorites for quick access. Voice commands allow hands-free operation, while the system automatically recalculates routes if you deviate from the planned path. Additional features include points of interest search and live traffic updates to help avoid delays. Regular system updates ensure the latest maps and features are available. This intuitive navigation system makes finding your way effortless and stress-free.

Model-Specific Guides

Model-specific guides provide detailed information tailored to each GMC Acadia model, highlighting unique features, differences, and specifications. These guides help owners understand their vehicle’s capabilities and personalization options.

Differences Between GMC Acadia Models (2007-2025)

The GMC Acadia has evolved significantly since its debut in 2007, with each model year introducing new features and improvements. Early models (2007-2012) focused on a full-size crossover design with a spacious interior. The 2013-2016 models saw a shift to a mid-size crossover with better fuel efficiency. From 2017 onward, the Acadia offered a more refined design, advanced safety features, and improved technology. The 2020 model introduced the off-road-focused AT4 trim, while the 2021 and 2023 models enhanced infotainment systems and driver-assistance technologies. Each generation and trim level offers unique capabilities, making it essential for owners to consult the manual specific to their model year for accurate information.

Special Features of the Acadia Denali

The GMC Acadia Denali stands out as the premium trim, offering exclusive luxury and advanced features. It boasts a refined interior with perforated leather-appointed seating, heated and ventilated front seats, and a dual-pane panoramic sunroof. The Denali also features a high-resolution 8-inch infotainment system with navigation, wireless Apple CarPlay, and Android Auto. Unique exterior styling includes a chrome grille, 20-inch aluminum wheels, and LED lighting. Driver-assistance technologies like adaptive cruise control and a Rear Camera Mirror enhance safety and convenience. The Denali’s robust performance is complemented by its elegant design, making it a top choice for those seeking a blend of sophistication and capability.

honeywell th4110u2005 manual pdf

Welcome to the Honeywell TH4110U2005 manual PDF guide, your essential resource for installing, programming, and operating this advanced programmable thermostat. Designed to enhance energy efficiency and comfort, this thermostat offers intuitive controls and compatibility with various HVAC systems. The manual provides step-by-step instructions, troubleshooting tips, and detailed explanations of features like programmable scheduling and keypad lockout. Whether you’re a homeowner or an installer, this guide ensures optimal setup and use of your Honeywell TH4110U2005 thermostat.

Overview of the Honeywell TH4110U2005 Thermostat

The Honeywell TH4110U2005 is a T4 Pro Programmable Thermostat designed for energy efficiency and ease of use. It offers programmable scheduling, compatibility with various HVAC systems, and a user-friendly interface with on-screen menus. Ideal for homeowners seeking precise temperature control, it supports multiple stages of heating and cooling. The thermostat features a universal mounting system and is suitable for both conventional and heat pump systems. Its programmable functionality allows users to set daily and weekly schedules, optimizing comfort and energy savings. With its straightforward installation and intuitive controls, the TH4110U2005 is a reliable choice for modern home comfort needs.

Importance of the Manual for Proper Installation and Use

The Honeywell TH4110U2005 manual is crucial for ensuring proper installation, configuration, and operation of the thermostat. It provides detailed step-by-step instructions for installing the device, including wiring diagrams and system compatibility checks. The manual also guides users through programming schedules, adjusting temperature settings, and utilizing advanced features like the keypad lockout. Troubleshooting sections help resolve common issues, such as display problems or temperature control errors. By following the manual, users can optimize their thermostat’s performance, ensure energy efficiency, and avoid potential installation mistakes. It serves as an essential reference for both homeowners and installers to maximize the thermostat’s functionality and longevity.

Key Features and Benefits of the Honeywell TH4110U2005

The Honeywell TH4110U2005 offers programmable functionality, compatibility with various HVAC systems, and a user-friendly interface. It ensures energy efficiency, optimal comfort, and seamless integration with home systems.

Programmable Functionality for Energy Efficiency

The Honeywell TH4110U2005 features programmable functionality, allowing users to set daily and weekly schedules for optimal energy savings. By programming specific temperature settings, homeowners can ensure the system operates efficiently, reducing energy waste when the home is unoccupied or during sleeping hours. The thermostat enables precise temperature control, with adjustments as small as one degree, ensuring comfort while minimizing energy consumption. Additionally, the programmable schedule can be easily modified through the on-screen menu, providing flexibility for changing routines. This feature is designed to help users save on utility bills while maintaining consistent comfort levels throughout the day.

Compatibility with Various HVAC Systems

The Honeywell TH4110U2005 thermostat is designed to work seamlessly with a wide range of HVAC systems, including 1H/1C systems, heat pumps, and gas, oil, or electric furnaces. Its universal design ensures compatibility with most residential heating and cooling setups, making it a versatile choice for homeowners. The thermostat also supports dual-fuel systems, providing flexibility for different climates and energy needs. With its adaptable wiring options and universal mounting system, the TH4110U2005 can be installed in various configurations, ensuring reliable performance across different HVAC setups. This compatibility makes it an ideal solution for upgrading or replacing existing thermostats in diverse home environments.

User-Friendly Interface and On-Screen Menus

The Honeywell TH4110U2005 features an intuitive, backlit display with on-screen menus that simplify thermostat operation. The user-friendly interface allows easy navigation through settings, making it accessible for both professionals and homeowners. The thermostat includes on-screen installation guides to help with setup, while the familiar Installer Setup (ISU) menu streamlines advanced configurations. Menus are logically organized, enabling quick adjustments to time, date, and temperature settings. The screen wakes up with any button press and remains lit for 45 seconds when powered by a C wire, ensuring convenience without unnecessary complexity. This design ensures a seamless experience for users of all skill levels.

Installation Guide for the Honeywell TH4110U2005

The manual provides a detailed installation guide for the Honeywell TH4110U2005, including step-by-step instructions and compatibility checks. It ensures a smooth setup process for HVAC systems.

Step-by-Step Installation Instructions

The Honeywell TH4110U2005 manual provides clear, step-by-step installation instructions to ensure a seamless setup process. Begin by turning off the power to your HVAC system at the circuit breaker. Next, remove the old thermostat and prepare the wiring for the new installation. Mount the universal mounting system provided with the thermostat, ensuring it is level and secure. Connect the wires to the appropriate terminals, referring to the wiring diagram in the manual. Once connected, restore power and test the system to ensure proper functionality. The on-screen menu will guide you through final configuration steps, making the process intuitive and straightforward. Always follow safety precautions and refer to the troubleshooting section if issues arise.

System Compatibility and Requirements

The Honeywell TH4110U2005 thermostat is designed to work with a variety of HVAC systems, including conventional, heat pump, and fan coil systems. It supports single-stage or multi-stage heating and cooling, ensuring compatibility with most home setups. For proper installation, the thermostat requires a C wire connection to maintain a constant power supply. The universal mounting system allows for easy installation on any standard wallplate. Additionally, it supports fan and compressor control through the K terminal, making it versatile for different system configurations. Ensure your HVAC system meets these requirements for optimal performance and energy efficiency.

Wiring Diagrams and Terminal Connections

The Honeywell TH4110U2005 manual provides detailed wiring diagrams and terminal connections to ensure proper installation. The thermostat requires a C wire for continuous power, while the K terminal handles fan and compressor control. Key terminals include R (24V), C (common), W (heating), Y (cooling), and G (fan). For heat pumps, the O and B terminals are used. The manual offers clear diagrams for single-stage, multi-stage, and heat pump systems, ensuring compatibility with various HVAC setups. Proper wiring is essential for functionality and energy efficiency. Follow the diagrams carefully to avoid installation issues and ensure all terminals are correctly connected for optimal performance.

Programming and Scheduling Options

The Honeywell TH4110U2005 allows setting up daily and weekly schedules for optimal comfort and energy efficiency. Use the on-screen menu to customize temperature settings and programs easily.

Setting Up Daily and Weekly Schedules

The Honeywell TH4110U2005 allows you to set up daily and weekly schedules for optimal temperature control. Program your thermostat to adjust temperatures during different times of the day, such as when you wake up, leave for work, return home, and go to sleep. This feature helps in saving energy and ensuring comfort throughout the day. You can also extend these settings to create a weekly schedule, maintaining consistent temperatures across all seven days. The user-friendly interface makes it easy to customize these settings, ensuring your home stays comfortable while optimizing energy usage. Refer to the manual for detailed setup instructions.

Adjusting Temperature Settings for Optimal Comfort

The Honeywell TH4110U2005 thermostat allows precise temperature adjustments to ensure optimal comfort and energy efficiency. Use the up and down arrows on the interface to increase or decrease the setpoint temperature. The thermostat provides a +/-1-degree precision, giving you full control over your home’s climate. For daily comfort, you can manually adjust the temperature or rely on programmed schedules. The thermostat also supports temporary hold settings, letting you override the schedule without disrupting your programmed preferences. Adjusting these settings is straightforward, thanks to the user-friendly interface. Refer to the manual for tips on configuring temperature settings to maximize both comfort and energy savings.

Understanding the ISU (Installer Setup) Menu

The ISU (Installer Setup) menu on the Honeywell TH4110U2005 thermostat is designed for advanced configuration during installation. This menu allows installers to customize system settings, such as selecting the HVAC system type (e.g., forced air, heat pump) and configuring heat and cool stages. It also enables adjustments to fan operation, compressor settings, and temperature parameters. Accessible by pressing and holding specific buttons, the ISU menu ensures proper system compatibility and performance. The manual provides detailed instructions for navigating and configuring these settings, ensuring a seamless installation process. Proper setup in the ISU menu is crucial for optimal thermostat operation and energy efficiency.

Advanced Features and Customization

The Honeywell TH4110U2005 offers advanced features like keypad lockout, fan and compressor controls, and a universal mounting system for enhanced customization and tailored comfort.

Using the Keypad Lockout Feature

The Honeywell TH4110U2005 thermostat offers a keypad lockout feature to prevent unauthorized temperature adjustments. This feature can be enabled through the ISU menu by selecting the lockout option, which may require entering a password for added security. The partial lockout allows limited adjustments, while full lockout disables all keypad functions. This is ideal for maintaining consistent settings in households with children or in public areas. The feature can be activated by pressing and holding the Menu and Down buttons, then navigating to the lockout settings. Refer to the manual for detailed steps and password setup instructions.

Configuring the Fan and Compressor Controls

The Honeywell TH4110U2005 thermostat allows precise control over fan and compressor operations, ensuring optimal system performance. To configure these settings, navigate to the ISU menu and select the appropriate options for your HVAC system. For heat pump systems, the K terminal can be used to control both the fan and compressor with a single wire. The thermostat also supports advanced fan controls, such as continuous operation or automatic mode, to maintain consistent airflow. Refer to the manual for detailed instructions on configuring these settings to match your system requirements and ensure energy-efficient operation.

Utilizing the Universal Mounting System

The Honeywell TH4110U2005 thermostat features a Universal Mounting System, designed to simplify installation across various HVAC setups. This system ensures compatibility with different wall types and wiring configurations, making it adaptable to both new installations and upgrades. On-screen installation guides further streamline the process, reducing the learning curve for installers. The universal design allows for secure and efficient mounting, ensuring reliable operation and longevity of the thermostat. This feature is particularly beneficial for homeowners and technicians alike, providing a hassle-free installation experience while maintaining optimal performance and energy efficiency.

Troubleshooting Common Issues

Address common issues like display malfunctions, power problems, or temperature inaccuracies. The manual provides error codes and step-by-step solutions for quick resolution and optimal performance.

Resolving Display and Power Issues

Experiencing a blank display or erratic power behavior? Check if the C wire is properly connected, as it powers the thermostat. Ensure all wiring matches the manual’s diagrams. If issues persist, reset the thermostat by removing batteries or disconnecting power for 30 seconds. Verify system compatibility and ensure firmware is up-to-date. For display inaccuracies, recalibrate the temperature settings via the ISU menu. Consult the manual’s troubleshooting section for specific error codes and solutions. Addressing these issues promptly ensures reliable performance and maintains optimal comfort control. Refer to the Honeywell TH4110U2005 manual PDF for detailed guidance on resolving display and power-related problems effectively.

Addressing Temperature Control Problems

If your Honeywell TH4110U2005 thermostat isn’t maintaining the set temperature, check the schedule settings to ensure they are correctly programmed. Verify that the thermostat is properly calibrated by navigating to the ISU menu and selecting the calibration option. Ensure the HVAC system is functioning correctly and that all vents are unobstructed. If the issue persists, reset the thermostat by disconnecting power for 30 seconds. Also, confirm that the thermostat is level on the wall, as improper installation can affect accuracy. For persistent issues, consult the Honeywell TH4110U2005 manual PDF for advanced troubleshooting steps or contact a professional for assistance. Regular maintenance and updates can prevent such problems, ensuring precise temperature control and system reliability.

Understanding Error Codes and Solutions

The Honeywell TH4110U2005 manual PDF provides detailed explanations of error codes and their solutions. Common issues like temperature fluctuations or system malfunctions are indicated by codes such as E1 (temperature sensor error) or E2 (communication failure). Refer to the manual’s troubleshooting section for specific code definitions; For example, E30 indicates a connectivity issue with the indoor sensor, which can be resolved by checking wiring or replacing the sensor. If error codes persist, reset the thermostat by disconnecting power for 30 seconds. The ISU (Installer Setup) menu also offers advanced diagnostic tools to address system-specific problems. Always consult the manual for precise solutions to ensure optimal performance and avoid further complications. Regular maintenance and updates can help prevent errors and maintain system reliability.

multiplying integers worksheet pdf

Discover the essentials of integer multiplication with our Multiplying Integers Worksheet PDF. Designed for practice, it includes various problem sets to help master positive and negative integer multiplication, offering clear structures and exercises for effective learning.

What is a Multiplying Integers Worksheet?

A Multiplying Integers Worksheet is a educational resource designed to help students practice multiplying positive and negative integers. These worksheets typically include a variety of problems, such as multiplying numbers with similar or different signs, and may also cover zero multiplication. Available in PDF format, they often feature clear layouts and may include answers for self-assessment. Worksheets are designed for different skill levels, from basic to advanced, and are widely used in classrooms and homeschooling to reinforce integer multiplication concepts. They are a practical tool for building confidence and fluency in math skills.

Why Use PDF Format for Math Worksheets?

The PDF format is ideal for math worksheets due to its versatility and convenience. PDFs maintain consistent formatting across devices, ensuring that integer multiplication problems are displayed clearly. They are easily downloadable and printable, making them accessible for both teachers and students. PDF worksheets are also sharable and can be stored digitally, reducing the need for physical copies. Additionally, PDFs often include interactive features like fillable fields, enhancing the learning experience. Their reliability and ease of use make PDFs a preferred choice for distributing and completing math practice materials like multiplying integers worksheets.

Importance of Learning Integer Multiplication

Mastering integer multiplication is crucial for developing problem-solving skills and a strong foundation in mathematics. It enhances problem-solving skills, applies to real-world scenarios, and prepares students for advanced mathematical concepts.

Real-World Applications of Integer Multiplication

Integer multiplication is essential in daily life, from calculating expenses to understanding weather patterns. For instance, budgeting involves multiplying negative balances, while scaling recipes requires adjusting quantities. It aids in financial planning, such as calculating savings or debts. In science, negative integers represent temperatures, and multiplying them helps in climate studies. Even in sports, tracking scores and statistics relies on integer multiplication. Practicing with multiplying integers worksheets prepares students to tackle real-life challenges efficiently, making math a practical tool for everyday problem-solving.

Building a Strong Foundation in Mathematics

Mastering integer multiplication is crucial for establishing a robust mathematical foundation. It enhances problem-solving skills and logical reasoning, essential for advanced math concepts. Understanding how to handle positive and negative integers prepares students for algebra, geometry, and calculus. Regular practice with multiplying integers worksheets reinforces these skills, ensuring accuracy and speed. A solid grasp of integer multiplication fosters confidence in tackling complex problems, making it a cornerstone of lifelong mathematical proficiency. Worksheets provide structured exercises, helping students build a strong base for future academic success in mathematics.

Basic Rules for Multiplying Integers

When multiplying integers, the product of two positives is positive, two negatives is positive, and mixed signs result in a negative product. Understanding these rules is fundamental for solving integer multiplication problems effectively.

Multiplying Positive Integers

Multiplying positive integers is straightforward: the product is always positive. For example, 6 × 4 equals 24. This rule applies to all positive numbers, ensuring consistent results. Practicing with worksheets helps build confidence and fluency in arithmetic operations. Understanding this foundational concept is crucial for advancing to more complex topics like negative integers and real-world applications. Regular practice with integer multiplication worksheets reinforces these skills, making calculations quicker and more accurate over time. Start with simple problems and gradually move to larger numbers to solidify your understanding of positive integer multiplication.

Multiplying negative integers follows a specific rule: the product of two negative integers is always positive. For example, (-6) × (-4) equals 24. This rule helps maintain consistency in calculations involving negative numbers. Understanding this concept is vital for solving more complex problems in mathematics. Worksheets dedicated to multiplying negative integers provide ample practice, ensuring mastery of the sign rules. Regular practice with these exercises builds confidence and improves arithmetic skills. Start with simple problems like (-2) × (-3) and progress to more challenging ones to reinforce your understanding of negative integer multiplication.

Methods for Teaching Integer Multiplication

Multiplying Negative Integers

Multiplying negative integers involves understanding the rule that two negatives make a positive. For instance, (-6) × (-4) equals 24. This consistency helps in solving complex problems. Worksheets provide ample practice, starting with simple problems like (-2) × (-3) and progressing to more challenging ones. Regular practice builds confidence and improves arithmetic skills, ensuring mastery of negative integer multiplication. These exercises are essential for a strong foundation in mathematics.

Using Visual Aids and Manipulatives

Visual aids and manipulatives are powerful tools for teaching integer multiplication, especially for visual learners. Using counters, number lines, or arrays helps students understand the concept of multiplying integers. Color-coded representations can differentiate positive and negative numbers, making it easier to grasp sign rules. Manipulatives like algebra tiles or interactive digital tools allow hands-on exploration, reinforcing the relationship between integers. Worksheets incorporating visual elements, such as shaded areas or number bonds, further enhance learning. These methods create a tangible connection to abstract concepts, fostering deeper understanding and engagement in the classroom or during independent practice.

Incorporating Real-World Examples

Integrating real-world examples into learning integer multiplication makes abstract concepts more relatable. Scenarios like calculating the total cost of items with negative budgets or determining temperatures dropping below zero illustrate practical applications. For instance, if a store offers a discount, multiplying the discount percentage by the original price shows financial impact. Similarly, weather changes involving negative temperatures can demonstrate how integers multiply in real life. These examples help students connect mathematical operations to everyday situations, enhancing their ability to apply integer multiplication meaningfully and confidently in various contexts beyond the classroom.

Interactive Activities for Engaged Learning

Engage students with interactive activities that make learning integer multiplication dynamic and enjoyable. Utilize online platforms like Kuta Software’s Infinite Pre-Algebra, which offers interactive PDF worksheets for practicing integer operations. Games, quizzes, and real-world problem-solving exercises can also captivate learners. For instance, budget planning scenarios or temperature change calculations involve integer multiplication, making it relatable. Interactive tools provide immediate feedback, fostering a deeper understanding and encouraging self-paced learning. These activities not only enhance retention but also make the learning process more immersive and fun, helping students grasp integer multiplication with confidence and enthusiasm.

Practicing Integer Multiplication

Regular practice with PDF worksheets is key to mastering integer multiplication. Use resources like Math-Drills.com for exercises on multiplying positive and negative integers effectively.

Benefits of Using Worksheets

Using PDF worksheets for integer multiplication offers structured practice, ensuring mastery of both positive and negative integers. These resources provide clear problem sets, allowing students to track progress and identify areas for improvement. Worksheets are often free, printable, and customizable, catering to different learning paces. They reinforce multiplication rules and sign conventions through repetitive exercises, making complex concepts more manageable. Regular use of worksheets helps build confidence and fluency in integer operations, preparing students for more advanced mathematical challenges. Their organized format and immediate feedback options make them an invaluable tool for effective learning and retention.

Recommended Online Resources for Practice

Enhance your practice with top online resources like Math-Drills.com, offering free PDF worksheets for integer multiplication. Kuta Software provides customizable worksheets and answer keys, ideal for targeted practice. Corbettmaths supports learning with video tutorials and practice questions. These platforms cater to various skill levels, ensuring comprehensive understanding. They offer structured exercises, clear examples, and immediate feedback, making them perfect for self-study or classroom use. Utilize these resources to reinforce multiplication rules and build confidence in handling positive and negative integers effectively. Regular practice with these tools will lead to mastery and improved problem-solving skills in integer multiplication.

Drills and Exercises for Mastery

Master integer multiplication with focused drills and exercises. Worksheets from Math-Drills.com offer problem sets tailored for both positive and negative integers, ensuring a solid grasp of sign rules. Kuta Software provides unlimited practice with customizable options, while Corbettmaths includes video support for complex concepts. Regular drills build fluency and confidence, helping learners apply multiplication skills to real-world scenarios. These resources are designed to reinforce understanding through repetition and varied problem types, ensuring long-term retention and mastery of integer multiplication.

Problem Solving with Integer Multiplication

Apply integer multiplication to solve real-world problems and complex math scenarios. Worksheets from Math-Drills.com and Kuta Software provide exercises that challenge problem-solving skills, promoting mathematical reasoning and practical application.

Applying Integer Multiplication to Word Problems

Integer multiplication is fundamental for solving real-world word problems. Worksheets from Math-Drills.com and Kuta Software provide exercises that link abstract math to practical scenarios. For instance, problems involving calculating total costs, population changes, or distances require multiplying integers with positive or negative values. These exercises help students understand how to apply sign rules in context, ensuring they can interpret results accurately. By practicing with word problems, learners develop critical thinking and mathematical reasoning skills, making integer multiplication a valuable tool for everyday applications and advanced problem-solving tasks.

Mixed Operations Involving Integers

Mixed operations with integers combine multiplication, addition, and subtraction, enhancing problem-solving skills. Worksheets from Math-Drills.com and Kuta Software offer exercises that integrate these operations, such as calculating total costs or temperature changes. For example, problems like “A bakery sells 15 loaves at $2 each and buys 8 packs of flour at -$5 each” require combining multiplication and subtraction. These exercises help students apply integer rules in complex scenarios, ensuring they can handle real-world math challenges effectively. Mixed operations build proficiency in multi-step problem-solving, a crucial skill for advanced mathematics and practical applications.

Assessing Progress in Integer Multiplication

Evaluate mastery through quizzes and interactive games, ensuring engaging and effective tracking of student progress in integer multiplication skills using tools like Kuta Software quizzes.

Using Quizzes to Track Improvement

Regular quizzes are an effective way to monitor progress in integer multiplication. Websites like Kuta Software offer customizable quizzes that target specific skills, such as multiplying positive and negative integers. These tools provide immediate feedback, helping students identify areas for improvement. Quizzes can be printed as PDFs or completed digitally, making them versatile for different learning environments. By incorporating quizzes into study routines, students can track their mastery of integer multiplication rules and concepts over time, ensuring a solid understanding of the subject. This methodical approach fosters confidence and readiness for more complex math challenges.

Incorporating Games for Fun Assessment

Games can transform assessment into an engaging experience while learning integer multiplication. Interactive activities, such as online quizzes and math puzzles, make practicing fun and dynamic. Websites like Math-Drills.com and Kuta Software offer PDF worksheets and digital tools that incorporate game-like elements to test skills. These resources allow students to compete with themselves or peers, fostering a sense of achievement. Games also provide immediate feedback, helping students identify strengths and areas needing improvement. By blending learning with entertainment, games create a motivating environment that encourages students to practice and master integer multiplication without feeling overwhelmed.

Reviewing and Understanding Mistakes

Reviewing mistakes is a crucial step in mastering integer multiplication. Worksheets often include answer keys, allowing students to compare their work and identify errors. Understanding where they went wrong helps reinforce learning. For example, a common mistake is misapplying sign rules, such as forgetting that a negative times a negative yields a positive. By analyzing errors, students can address misconceptions and improve their problem-solving skills. Many PDF worksheets, like those from Math-Drills.com, provide space for corrections, encouraging students to revisit and fix their mistakes. This process fosters a deeper understanding and better retention of integer multiplication concepts.

manual de reparación de motor kohler

Kohler engines are renowned for their durability and reliability, powering various equipment worldwide. Models like Kohler 25 455 21-S showcase innovative design and performance. Proper operation and maintenance are crucial for longevity, with new engines requiring at least 50 hours of standard oil use for piston ring seating. This manual provides essential insights for troubleshooting, repair, and optimization, ensuring peak performance and extending engine life.

1.1. Overview of Kohler Engine Models

Kohler engines are available in various models, each designed for specific applications. The Kohler 25 455 21-S is a popular choice, known for its reliability and performance. These engines are widely used in generators, lawn mowers, and industrial equipment. Models vary in horsepower, fuel type, and design, catering to different power needs. Understanding the unique features of each model is essential for effective repair and maintenance.

1.2. Importance of Regular Maintenance and Repair

Regular maintenance is vital for extending the life of Kohler engines. Proper oil changes, filter replacements, and inspections prevent premature wear. Neglecting maintenance can lead to costly repairs and reduced performance. Following a structured maintenance schedule ensures optimal engine function, minimizes downtime, and maintains efficiency. Addressing issues promptly prevents minor problems from escalating into major breakdowns, safeguarding your investment and ensuring reliable operation over time.

Essential Tools and Materials for Repair

Specialized tools like the Jumper Lead Tool (Kohler 25 455 21-S) and Triad/OHC Timing Tool Set (Kohler 25 518 43-S) are crucial for accurate repairs. Essential materials include high-quality oils, filters, and replacement parts to ensure optimal performance and durability. Proper tools and materials are vital for maintaining engine integrity and preventing further damage during repairs.

2.1. Specialized Tools for Kohler Engines

Specialized tools like the Jumper Lead Tool (Kohler 25 455 21-S) and Triad/OHC Timing Tool Set (Kohler 25 518 43-S) are essential for precise repairs. These tools enable technicians to test stepper motors and adjust timing accurately. They are designed specifically for Kohler engines, ensuring compatibility and effectiveness. Using the correct tools is critical for achieving accurate repairs and preventing further engine damage during servicing.

2.2. Safety Equipment and Precautions

Always wear protective gear, including gloves, safety goggles, and a face mask, when working with Kohler engines. Ensure proper ventilation to avoid inhaling harmful fumes. Keep a fire extinguisher nearby and avoid loose clothing that could catch sparks. Never bypass safety precautions, as improper handling of fuels or electrical components can lead to accidents. Use heat-resistant gloves when handling hot engine parts and ensure the workspace is clear of flammable materials.

Safety Guidelines for Engine Repair

Always wear protective gear, ensure proper ventilation, and handle fuels and electrical components safely. Keep flammable materials away and avoid loose clothing that could catch sparks.

3.1. Proper Handling of Fuel and Chemicals

Always handle fuel and chemicals in a well-ventilated area, away from open flames or sparks. Use approved containers and protective gear like gloves and goggles. Store fuels and chemicals in designated areas, following safety guidelines. Dispose of waste properly and avoid mixing substances. Refer to the Kohler service manual for specific instructions on handling fuel systems and chemical products safely during repairs.

3.2. Electrical Safety Measures

Ensure the engine is disconnected from the power source before starting repairs. Use a multimeter to verify no voltage is present. Avoid wearing jewelry that could conduct electricity. Keep work areas dry and well-lit. Follow the Kohler service manual’s electrical safety protocols to prevent shocks or accidents. Always ground equipment properly and use insulated tools when handling electrical components.

Diagnostic Procedures

Kohler engine diagnostics involve identifying common issues like leaks or noise. Use tools like the Jumper Lead Tool for stepper motor testing. Refer to service manuals for troubleshooting guides and repair solutions to address specific problems effectively and ensure proper engine functionality. Regular checks help prevent major breakdowns and maintain optimal performance.

4.1. Identifying Common Issues in Kohler Engines

Kohler engines often experience issues like leaks, noise, or performance problems. Leaks may stem from worn gaskets or seals, while noise could indicate loose components or faulty piston rings. Performance issues might arise from fuel system malfunctions or ignition problems. Diagnosing these requires tools like the Jumper Lead Tool for stepper motor testing. Troubleshooting involves checking components, referencing service manuals, and addressing problems systematically to ensure accurate repairs and optimal engine functionality.

4.2. Using Diagnostic Tools and Software

Diagnostic tools like the Jumper Lead Tool and Triad/OHC Timing Tool Set are essential for identifying issues in Kohler engines. Software solutions provide real-time monitoring of engine parameters, aiding in troubleshooting. These tools help detect problems such as ignition system faults or fuel flow irregularities, ensuring precise repairs. Regular use of diagnostic tools enhances maintenance efficiency and prolongs engine lifespan by addressing issues early.

Disassembly and Inspection

Disassembly involves carefully removing components like piston rings and cylinders. Inspection focuses on identifying wear or damage, ensuring proper seating of parts after reassembly. Tools like the Jumper Lead Tool aid in this process, while 50 hours of initial operation help piston rings seat correctly for optimal performance and longevity.

5.1. Step-by-Step Engine Disassembly

Begin by draining fluids and disconnecting electrical components. Remove the air filter and spark plug to decompress the engine. Use specialized tools like the Jumper Lead Tool and Triad/OHC Timing Tool Set for precise disassembly. Carefully extract the cylinder head, pistons, and crankshaft, documenting each step for reassembly. Proper sequencing ensures minimal damage and accurate reinstallation of components.

5.2. Inspecting Engine Components for Wear or Damage

Inspect piston rings for scoring or wear and check cylinders for damage or excessive clearance. Measure crankshaft journals with a micrometer to detect wear. Look for signs of damage on valves, spark plugs, and engine bearings. Gently handle components to avoid further damage. Replace any worn or damaged parts to ensure proper engine function and performance. Consult the Kohler service manual for specific inspection guidelines and specifications.

Replacing Worn or Damaged Parts

Replace piston rings, cylinders, and crankshaft components as needed. Use specialized tools like the Triad/OHC Timing Tool Set for precise repairs. Ensure proper alignment and torque specifications for optimal performance.

6.1. Piston Rings and Cylinder Replacement

Replacing piston rings and cylinders is critical for restoring engine performance. Always use genuine Kohler parts and follow torque specifications. After installation, operate the engine for at least 50 hours with standard petroleum-based oil to allow proper seating of new piston rings. Use specialized tools like the Triad/OHC Timing Tool Set for accurate cylinder alignment and replacement.

6.2. Rebuilding the Crankshaft and Camshaft

Rebuilding the crankshaft and camshaft requires precision. Inspect for wear or damage, replacing components as needed. Use specialized tools like the Stepper Motor Controller Tool for accurate reassembly. Apply correct torque specifications during installation. Ensure all components are clean and properly lubricated before reassembly. This process restores engine efficiency and prevents future damage, ensuring optimal performance.

Reassembly Process

The reassembly process involves using correct torque specifications, aligning components accurately, and ensuring all parts are clean and properly fitted using essential specialized tools for optimal performance.

7.1. Aligning and Refitting Engine Components

Aligning and refitting engine components requires precision to ensure proper functionality. Use specialized tools like the Kohler 25 518 43-S Triad/OHC Timing Tool Set for accurate alignment. Follow torque specifications carefully to avoid damage. Ensure all parts fit snugly without forcing, and verify alignment before securing components. Proper fitment is crucial for engine performance and longevity.

7.2. Torque Specifications for Reassembly

Adhering to torque specifications is critical during reassembly to ensure engine integrity. Refer to Kohler’s service manual for precise values, as over-tightening can damage threads or components. Use a torque wrench to apply the correct pressure, following the sequence outlined in the manual. Proper torque ensures optimal performance, prevents leaks, and extends engine life.

Testing and Quality Assurance

Post-repair testing ensures engine functionality and reliability. Conduct thorough checks on performance, leaks, and noise levels to confirm all issues are resolved effectively and efficiently.

8.1. Running Initial Tests After Repair

After repair, conduct a thorough initial test to ensure proper engine function. Start with a warm-up period to check for leaks or unusual noise. Monitor coolant temperature, oil pressure, and fuel flow. Use tools like the Jumper Lead Tool to test stepper motors. Ensure all systems operate within specifications before full operation. This step confirms repair success and readiness for normal use.

8.2. Ensuring Proper Engine Performance

After repair, verify engine performance by monitoring fuel efficiency, emissions, and overall operation. Check for smooth acceleration, consistent power delivery, and proper system functionality. Ensure all components, such as the coolant and fuel systems, are working harmoniously. Address any irregularities promptly to maintain reliability and optimal performance, guaranteeing the engine operates as intended under various conditions and loads.

Maintenance Tips for Long-Term Engine Health

Regular oil changes and filter replacements are vital for engine longevity. Monitor coolant and fuel systems to prevent corrosion and ensure proper combustion and temperature regulation.

9.1. Regular Oil Changes and Filter Replacement

Regular oil changes are essential for maintaining engine health. Synthetic or conventional oil should be used as specified in the Kohler manual. Filters, including air and fuel, must be replaced every 50-100 hours of operation to ensure proper engine performance and longevity. Dispose of used oil and filters responsibly. Consistent maintenance prevents wear, corrosion, and overheating, ensuring optimal engine function and extending its lifespan significantly.

9.2. Monitoring Coolant and Fuel Systems

Regularly inspect the coolant system to prevent overheating and corrosion. Check coolant levels, hoses, and radiators for leaks or damage. For fuel systems, ensure filters are clean and fuel is free from contaminants. Use high-quality fuel as specified in the Kohler manual to avoid engine damage. Proper maintenance of these systems is crucial for optimal performance, efficiency, and long-term reliability of the engine.

Troubleshooting Common Post-Repair Issues

Common post-repair issues include leaks, unusual noises, and performance problems. Use diagnostic tools to identify root causes and apply targeted solutions for reliable engine operation.

10.1. Addressing Leaks and Noise Problems

Leaks often stem from gasket or seal failures, requiring replacement. Noise issues may arise from loose components or worn parts. Use tools like the Jumper Lead Tool or Timing Tool Set to diagnose and tighten connections. Inspect piston rings and cylinders for proper seating. Addressing these issues promptly ensures smooth operation and prevents further damage. Always test repairs thoroughly to confirm resolution.

10.2. Resolving Starting and Performance Issues

Starting problems may stem from ignition or fuel system issues. Check spark plugs, air filters, and fuel lines for blockages or wear. Performance issues often relate to improper carburetor adjustments or clogged components. Ensure oil levels and quality meet specifications. Addressing these problems promptly can restore optimal engine function. Always refer to Kohler service manuals for specific diagnostic and repair guidance.

Resources for Further Assistance

Consult Kohler’s official service manuals for detailed repair guidance. Online forums and expert communities offer valuable insights and troubleshooting tips from experienced technicians and engine enthusiasts worldwide.

11.1. Kohler Service Manuals and Guides

Kohler service manuals provide comprehensive repair instructions, including diagnostic procedures and part replacement guidelines. These resources are tailored for both novice and experienced technicians, ensuring accurate troubleshooting. The manuals cover various engine models, offering detailed schematics and torque specifications for reassembly. Additionally, they emphasize proper handling of fuel and chemicals, aligning with safety guidelines. Regular updates ensure the information stays current and relevant for all Kohler engine repairs.

11.2. Online Forums and Expert Communities

Online forums and expert communities offer valuable resources for Kohler engine repair. These platforms provide real-time advice, troubleshooting tips, and shared experiences from experienced technicians. Many forums include discussions on specific tools, like the Jumper Lead Tool and Triad/OHC Timing Tool Set, and common issues such as piston ring seating and engine performance. Engaging with these communities can enhance your repair skills and ensure adherence to safety guidelines, fostering a collaborative environment for problem-solving.

Thank you for following this comprehensive guide on Kohler engine repair. Proper maintenance, diagnostic tools, and adherence to safety protocols ensure optimal performance and longevity. Always use genuine tools like the Jumper Lead Tool and Triad/OHC Timing Tool Set for precise repairs. Remember, new engines require 50 hours of standard oil operation for piston rings to seat correctly. Happy repairing!

12.1. Summary of Key Repair Steps

Successful Kohler engine repair involves proper disassembly, inspection, and replacement of worn parts. Use specialized tools like the Jumper Lead Tool and Triad/OHC Timing Tool Set for accuracy. Ensure components are reassembled with correct torque specifications. After repair, run initial tests to verify performance. Regular maintenance, such as oil changes and coolant checks, is essential for long-term reliability. Always refer to Kohler service manuals for precise guidance.

12.2. Final Tips for Successful Engine Repair

Always reference Kohler service manuals for specific guidance. Ensure proper torque specifications and oil change intervals for optimal performance. Test engines thoroughly after repairs to confirm functionality. Use specialized tools like the Jumper Lead Tool for accuracy. Prioritize safety and follow recommended maintenance schedules to extend engine life. Regular inspections and timely replacements prevent major issues, ensuring reliability and efficiency in the long run.

solos for young violists volume 2 pdf

Solos for Young Violists Volume 2 offers an inspiring collection of repertoire tailored for developing violists․ Each piece is carefully selected to foster both technical skill and musical expression, nurturing a lifelong passion for music in young artists․

Overview of the Collection

“Solos for Young Violists Volume 2” is a thoughtfully curated collection of 11 solos designed for intermediate to advanced students․ Each piece is selected from renowned composers, offering a diverse range of styles and periods․ From Baroque to contemporary works, the collection provides a balanced mix of technical challenges and expressive opportunities․ This volume is ideal for fostering artistic growth, as it bridges the gap between study materials and advanced repertoire, making it a valuable resource for both students and teachers․

Importance of Solo Repertoire for Young Violists

Solo repertoire is essential for young violists, as it fosters technical mastery, musicality, and confidence․ Playing solos allows students to develop tone, bow control, and phrasing while exploring their individual artistic voice․ Solo performance prepares them for auditions, competitions, and recitals, building stage presence and self-assurance․ A well-chosen repertoire, like that in “Solos for Young Violists Volume 2,” challenges students to grow technically and artistically, laying a strong foundation for advanced studies and a lifelong love of music․

Key Features of “Solos for Young Violists Volume 2”

“Solos for Young Violists Volume 2” offers a diverse repertoire, structured to progress technically and musically, with expertly arranged pieces and performance notes to guide young artists․

Repertoire Selection

“Solos for Young Violists Volume 2” features a thoughtfully curated selection of pieces, ranging from classical masterpieces to contemporary works․ Each composition is chosen to provide a balance of technical challenge and expressive opportunity, fostering artistic growth․ The repertoire spans various styles and periods, introducing young violists to diverse musical traditions․ From Baroque elegance to modern innovation, these solos are designed to captivate both performers and audiences, while aligning with pedagogical goals to enhance skill development and musical understanding․

Pedagogical Design and Structure

“Solos for Young Violists Volume 2” is thoughtfully structured to support the developmental needs of intermediate to advanced students․ The collection progresses in difficulty, with each piece building on technical and musical concepts․ Etudes and solos are carefully selected to address specific skills, such as bowing techniques, finger dexterity, and intonation․ Performance notes and interpretive guidance are included to aid students and teachers in understanding musical context and expressive intent, ensuring a well-rounded educational experience․

Performance and Interpretation Notes

The collection includes detailed performance and interpretation notes, offering insights into dynamics, articulation, phrasing, and tempo․ These notes guide young violists in understanding the emotional and technical nuances of each piece․ Suggestions for bow strokes, finger placement, and expressive techniques are provided to enhance musicality․ The notes also encourage students to explore their own artistic interpretation, fostering confidence and creativity in performance․ This resource empowers violists to deliver polished and captivating renditions of the solos․

Benefits for Young Violists

This collection enhances technical skills, nurtures musicality, and builds confidence․ It provides a structured approach to learning, helping young violists develop artistry and prepare for advanced repertoire․

Technical Development

Solos for Young Violists Volume 2 focuses on refining essential viola techniques․ Pieces are designed to improve intonation, bow control, and finger dexterity․ Students will enhance their ability to navigate shifting positions and intricate rhythms․ The repertoire gradually increases in difficulty, ensuring a steady progression of skills․ By mastering these solos, young violists build a strong technical foundation, preparing them for advanced repertoire and fostering musical precision․

Musicality and Artistic Expression

Solos for Young Violists Volume 2 encourages the development of musicality and artistic expression․ Each piece is crafted to inspire phrasing, dynamics, and tone production, helping students connect with the emotional depth of music․ The collection introduces a variety of styles, from lyrical melodies to lively rhythms, fostering a well-rounded artistic understanding․ By exploring these works, young violists learn to convey their unique voice and interpretation, cultivating a deeper appreciation for music and performance․

Building Confidence and Performance Skills

Solos for Young Violists Volume 2 helps students build confidence and performance skills through carefully selected repertoire․ Each piece is designed to gradually challenge students, allowing them to showcase their progress and artistry․ The collection provides opportunities for young violists to develop stage presence, bow control, and intonation accuracy․ By mastering these solos, students gain the confidence to perform in front of audiences, fostering a positive and enjoyable performance experience that enriches their musical journey․

How to Use the PDF Version Effectively

Effectively use the PDF by navigating easily between pieces, utilizing bookmarks, and printing selected solos․ Employ digital tools for practice, such as looping sections and adjusting tempo․

Accessing and Navigating the PDF

The PDF version of “Solos for Young Violists Volume 2” can be easily accessed and downloaded from official sources or recommended platforms․ Once opened, users can navigate seamlessly using built-in bookmarks and thumbnails, allowing quick access to specific pieces․ The clear layout and organized structure ensure that young violists can focus on their practice without distractions․ Digital tools enable highlighting, annotating, and adjusting tempos, making the PDF a versatile resource for both students and teachers to enhance their musical journey․

Practice Tips and Strategies

Begin by setting achievable goals for each practice session, focusing on specific techniques or musical phrases․ Start with slower tempos to ensure accuracy and gradually increase speed․ Use a metronome to improve timing and rhythm․ Listen to recordings of professional violists to develop musicality and phrasing․ Practice scales and arpeggios to build finger dexterity․ Record your sessions to track progress and identify areas for improvement․ Incorporate warm-ups and exercises to strengthen bow control and intonation․ Stay consistent, patient, and open to feedback to maximize growth and enjoyment․

Target Audience

This collection is ideal for intermediate to advanced young violists seeking to expand their repertoire and refine their skills․ It also serves as a valuable resource for teachers and instructors guiding developing musicians․

Intermediate to Advanced Students

Solos for Young Violists Volume 2 is designed for intermediate to advanced students, offering challenging yet rewarding repertoire․ These pieces refine technical skills like intonation, bow control, and articulation while fostering deeper musicality․ The collection progresses in difficulty, allowing students to grow confidently․ It bridges the gap between foundational studies and advanced literature, preparing young violists for more complex works․ This volume is an essential tool for students aiming to elevate their performance abilities and expressiveness․

Teachers and Instructors

Solos for Young Violists Volume 2 is an invaluable resource for teachers and instructors, providing a well-curated selection of repertoire that aligns with the developmental needs of their students․ The collection offers diverse styles and periods, encouraging a broad musical understanding․ With its structured progression, it aids in lesson planning and curriculum development․ Performance and interpretation notes further support educators in guiding their students toward expressive and technically proficient performances, making it a comprehensive tool for both teaching and learning․

Solos for Young Violists Volume 2 is a cornerstone for developing violists, offering pieces that enhance technical growth, musicality, and confidence, inspiring a lifelong love for music․

Final Thoughts on the Value of the Collection

Solos for Young Violists Volume 2 stands as an invaluable resource for nurturing the artistic and technical growth of young musicians․ Its carefully curated repertoire bridges the gap between educational and performance materials, offering pieces that inspire and challenge․ By focusing on both technical development and expressive qualities, this collection empowers violists to build confidence and refine their skills․ It serves as a timeless foundation for any student seeking to advance their musical journey with elegance and precision․

Encouragement for Continued Practice

Consistent practice is key to unlocking the full potential of Solos for Young Violists Volume 2․ Each piece offers a unique opportunity to refine technique, explore musicality, and develop artistic expression․ As students progress, they’ll experience the rewarding journey of mastering challenging repertoire․ Encourage young violists to embrace the process, celebrate small victories, and strive for their personal best․ Dedicated practice fosters confidence, discipline, and a lifelong appreciation for music, making this collection a powerful tool for their musical growth and enjoyment․

Where to Find “Solos for Young Violists Volume 2” in PDF

The PDF version of Solos for Young Violists Volume 2 can be found on official music publishers’ websites, online marketplaces like Amazon, or educational music platforms․

Official Sources

The Solos for Young Violists Volume 2 PDF is available through the publisher’s official website and trusted music education platforms․ Purchasing directly from these sources ensures authenticity and supports the creators․ Additionally, it can be found on platforms like Musicnotes or Sheet Music Plus․ Some music schools and libraries may also offer institutional access․ Always verify the source to avoid unauthorized copies and ensure you receive the complete, high-quality edition․

Recommended Platforms for Purchase

For purchasing the Solos for Young Violists Volume 2 PDF, consider trusted platforms like Musicnotes or Sheet Music Plus․ These sites offer high-quality, legally licensed editions․ Additionally, J․W․ Pepper is a reliable source for educational music materials․ Always choose platforms with secure payment options and clear previews to ensure authenticity and quality․ Avoid unauthorized sources to support composers and publishers․ These platforms provide convenient access to the repertoire, ensuring a seamless purchasing experience for educators and students alike․

1 4 5 6 7 8 20